This guide will help you configure the automated email communications sent from Advanced Billing to your customers.
Configure Themes Install Theme
Summary
- Feature
- Emails
- You Need
- The email address you wish to use to send emails from in Advanced Billing; small HTML coding knowledge if customizing email layout.
- Code
- Liquid syntax, such as
{{name}}, if customizing dynamic language - Difficulty
- ◉◉◎◎◎
Configure Emails
Advanced Billing offers many configurable email settings for customizing communications with your customers about their subscriptions and invoices.
| Best for | |
|---|---|
|
Signup Emails |
Notifying customers and yourself of signups. |
|
Customer Receipt Emails |
Notifying customers of payment for their subscription. |
|
Card Expiration Emails |
Notifying customers when the credit card on file for their subscription is about to expire. These email notifications are sent on the 1st, 15th, and 23rd of the month. For example, if the customer's card expires 01/2024, they receive 3 emails on 01/01/24, 01/15/24, 01/23/2024. |
|
End of Trial Emails |
Notifying customers that their trialing subscription is about to expire. |
|
Upcoming Renewal Emails |
Notifying customers of an upcoming subscription renewal. |
|
Cancellation Emails |
Notifying customers that their subscription has been canceled. |
|
Update Payment Request Emails |
Requesting that a customer updates the payment details for their subscription. |
|
Prepaid Subscription Payment Receipt Emails |
Notifying customers of payment for their prepaid subscription. Only available for sites that have the prepaid subscriptions feature enabled. |
|
Suspended Prepaid Subscription Emails |
Notifying customers that their prepaid subscription has been suspended as its prepayment balance has been depleted. Only available for sites that have the prepaid subscriptions feature enabled. |
|
Reactivated Prepaid Subscription Emails |
Notifying customers that their prepaid subscription has been reactivated from a suspended state. Only available for sites that have the prepaid subscriptions feature enabled. |
|
Billing Portal Invite |
Upon new signup, email the customer a link to log in to the Billing Portal. Quickstart discussed in: Implement Billing Portal Login > Method 1: Email Invite. |
|
Invoices |
Invoice emails. Quickstart discussed in Configure Invoices > Step 2. |
|
Dunning |
Dunning emails when a subscription is past due. Discussed in Retries and Dunning > General Settings Step 1. |
Helpful Resources:
- Getting Started (Basic)
- Liquid for Designers (Advanced)
- Full list of fields
Example
Let's say you want to display the Organization Name in the email, rather than Customer Name, but only if the Organization Name is present.
{% if customer.organization !="" %}
  Hello {{customer.organization}},
{% else %}
  Hello {{customer.first_name}},
{% endif %}
- Set From Address for all emails
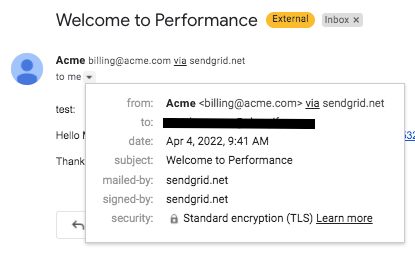
Edit your Site Settings. On the top menu, click your Site Name > Edit Current Site > go to Reply Email section. If you want to override a from address for a specific email, use step 2.
From gmail, the inbox view:
From gmail, the email view:
- Set the From Address for one email
Override the value from step 1, for a specific email. In the From section, edit the default value of{{from_address}}, to the email you'd like. For exampleAcme Billing <do-not-reply@acme.com>.
1. Simulate your scenario (eg: a new signup), and include realistic data.
2. Analyze your email, from your customer's perspective
3. Repeat for each scenario
As you find areas to optimize, use the steps above to assist.
Summary
- Advanced Billing Feature
- Emails
- You Need
- An email theme/template
- Code
- HTML if customizing layouts
- Difficulty
- ◉◉◎◎◎
Install an Email Template
Advanced Billing offers many configurable email settings for customizing communications with your customers about their subscriptions and invoices.
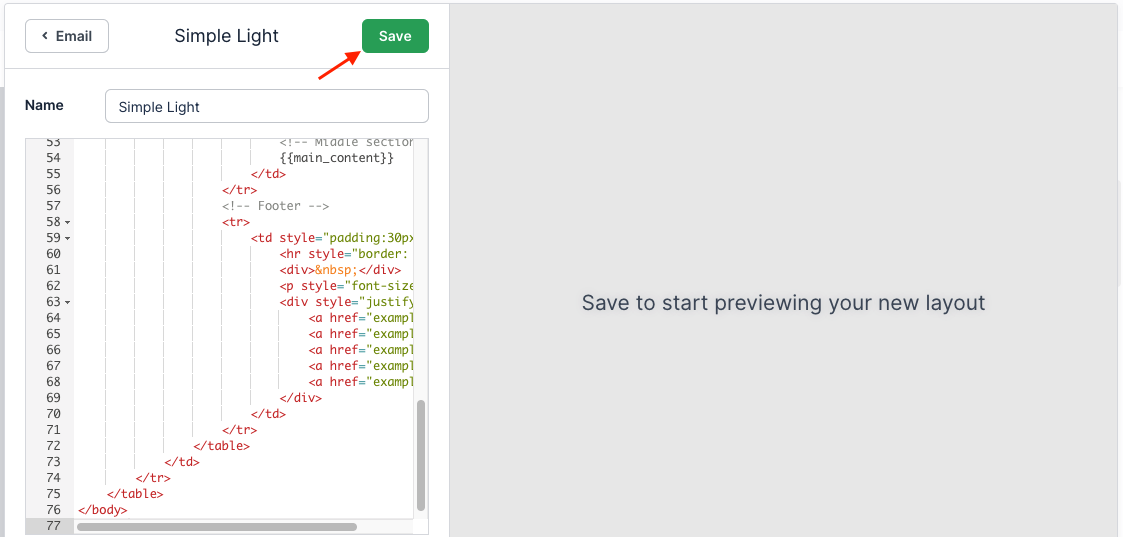
2. On any email, click "Edit Template" then click the + icon.

3. Copy/paste the prebuilt template, name it, and press "Save".

<div style="justify-content: center;display: flex;margin:40px 0px;">
  <a href="https://example.com" style="color:#ffffff;background-color:#006fbe;text-decoration:none;text-align:center;border-radius:5px;padding:20px;font-weight:600;">Click here to learn more</a>
</div>