Under the settings for your site, you will find the options to define the settings for all of your Public Signup Pages, Receipt pages and/or Self-Service Pages. This is different than the individual Public Signup Page settings.
You can customize the look and feel of your Public Pages to match your site by uploading a logo, providing custom CSS and JavaScript, and specifying URLs that link back to your site.
If you need information on how to use the Public Pages to sell subscriptions, please see the our example implementation._
There are two ways of customizing your Public Signup Pages:
- You can either edit the default Settings that apply to all Public Pages at once. No additional customization is required for each Public Signup Page.
- Edit individual Public Signup Page settings by overriding the default settings.
Choosing Default Settings for all Public Pages

View default settings for Public Signup Pages in your site
Default Public Signup Page Version
This sets the default layout version to version 2, (modern), for Public Signup Pages, which are auto-created when a new product is created. This can be changed for any individual Public Signup Page by editing that page’s layout version in the settings. ) All new pages default to modern (v2) Public Signup Pages
Page Title
The title will be displayed at the top of the page and in the title of the browser window. The and keywords will be replaced with the actual product name and product family name of the product. If left blank, the title will be set as “Product Family Name: Product Name”.

Upload your logo
Your logo will be displayed at the top of the Public Signup Page, above the page title.

Upload a default logo for use across all Public Signup Pages
To upload a logo, use the file upload button to select your image. Supported file types are .gif, .jpeg, and .png. Images will automatically be resized to a maximum width of 800px and a maximum height of 100px.
Available on:
- Public Signup Pages
- Receipt Pages
- Self Service Pages
Home Link URL
Give your subscribers the option to click on the logo to be redirected back to the home page.

Default URL that will direct a subscriber to your home address. Must begin with 'http://' or 'https://'.
Available on:
- Public Signup Pages
- Receipt Pages
- Self Service Pages
Privacy policy URL
A link to your privacy policy will appear in the footer of the Public Signup Page.

Enter a link to your privacy policy page. Must begin with 'http://' or 'https://'.
Available on:
- Public Signup Pages
- Self Service Pages
Terms and conditions URL
If a link to terms is a provided the customer will be required to agree to the terms before subscribing. A link to the terms will also appear in the footer.

Enter a link to your terms and conditions. Must begin with 'http://' or 'https://'.
A checkbox will appear to require the user to agree to the terms on the Public Signup Page.

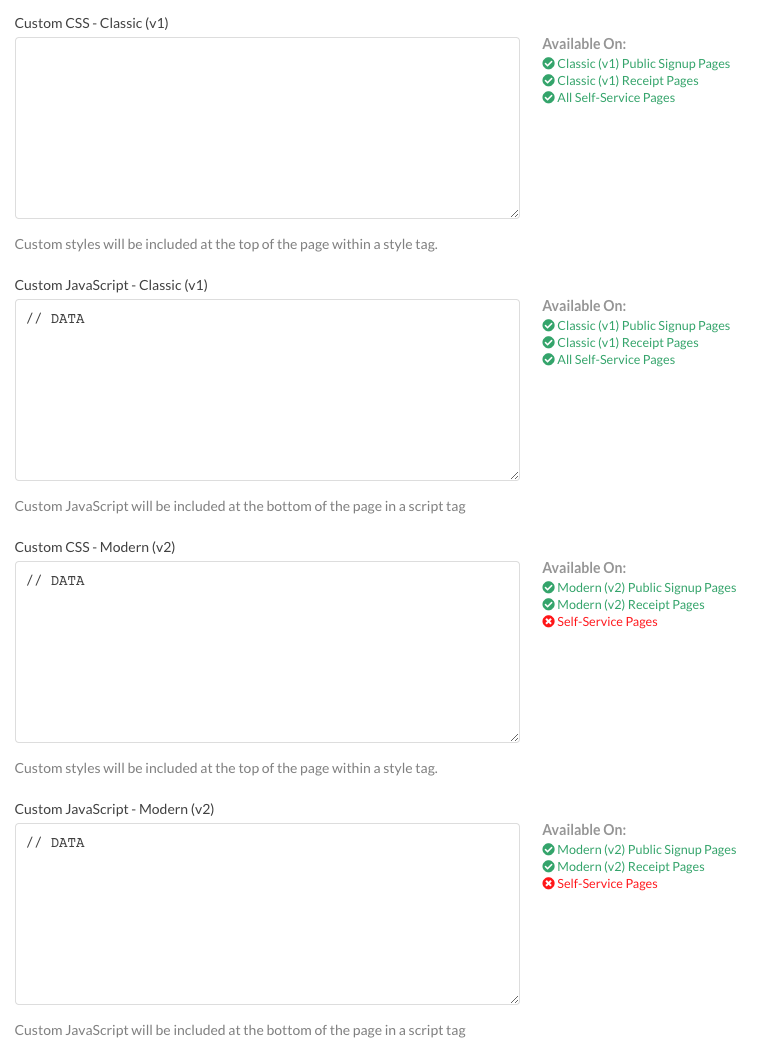
Add Custom CSS and JavaScript

Location of custom JavaScript and CSS entry fields
Individual “Public Page Default Settings” also provides input fields to collect custom CSS and JavaScript for your site for both of the layout versions. Content in the CSS field will be included at the top of the page in a stylesheet tag. Custom JavaScript will be included at the bottom of the page and wrapped in a script tag.
We’ve put together a guide for using your own Customer Javascript and CSS for the Modern and for Classic Public Signup Pages.
NOTE: Please note that this feature is only available on paid accounts. If you need access during onboarding, please contact us”
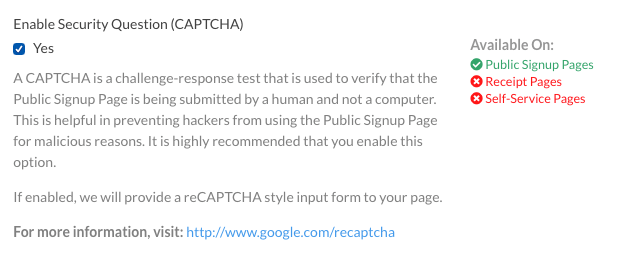
Enable Security Question (CAPTCHA)
A CAPTCHA is a challenge-response test that is used to verify that the Public Signup Page is being submitted by a human and not a computer. This is helpful in preventing hackers from using the Public Signup Page for malicious reasons. It is highly recommended that you enable this option.

Insert captcha image to deter fake signups
If enabled, we will provide a reCAPTCHA style input form to your page.
Available on:
- Public Signup Pages
Accepted Card Types to Display
Check the checkbox next to each card logo for that logo to display on the Public Signup Page. Unchecking one of the the cards will not prevent users from entering a card of that type.
Available on:
- Public Signup Pages
- Self Service Pages

Select credit card badges to display on your Public Signup Pages
Enable ‘Powered By Advanced Billing Badge’
If you enable the following in your default page settings:

Advanced Billing will display a logo showing that Advanced Billing powers your payments and link to extra info about security for your customers:

How the "Powered by Advanced Billing" badge will appear on your signup pages