Adding a Custom Field

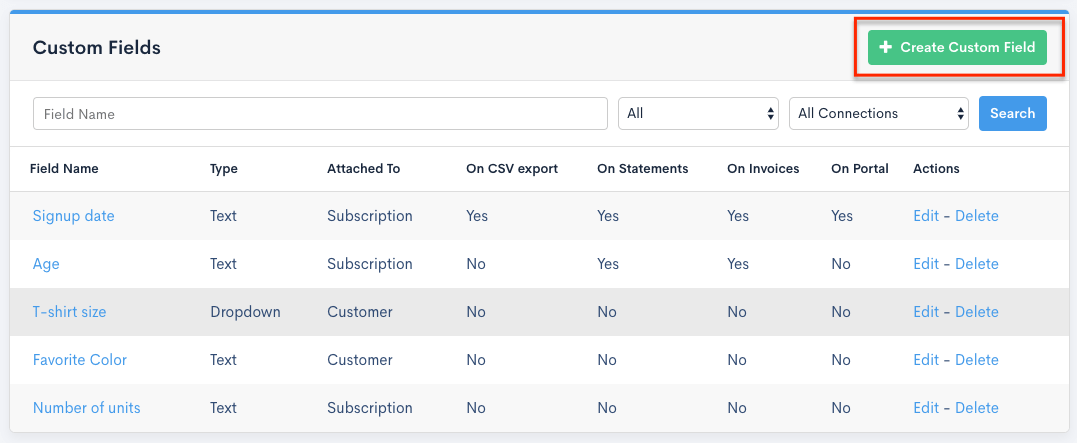
Select the option to create a custom field.
Configuration
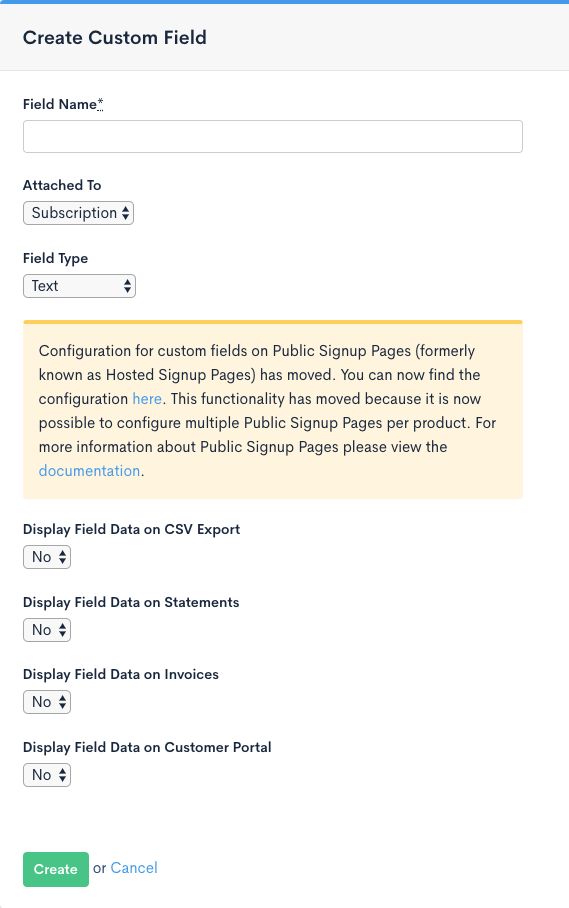
Once you are in the custom field editor, enter a field name and select a type.
-
Field Name: This text will be displayed on the Public Signup Page to prompt the user for input.
-
Attached To: This will determine if the custom field is associated with a Subscription or a Customer record
-
Field Type: Text, Dropdown or Radio Button

Configure your custom field.
Display Options
There are several options to control where your custom field will appear. All display options are set to no by default.
-
Display Field Data on CSV Export: If Yes, the field will be included in the Subscriptions CSV Export.
-
Display Field Data on Statements: If Yes, the field will be displayed on your customers’ Statements
-
Display Field Data on Invoices: If Yes, the field will be displayed on your customers’ Invoices. (Invoice billing is available starting on the Plus plan.)
-
Display Field Data on Customer Portal: If Yes, the field will be displayed on your customer’s billing portal
Allowed Values
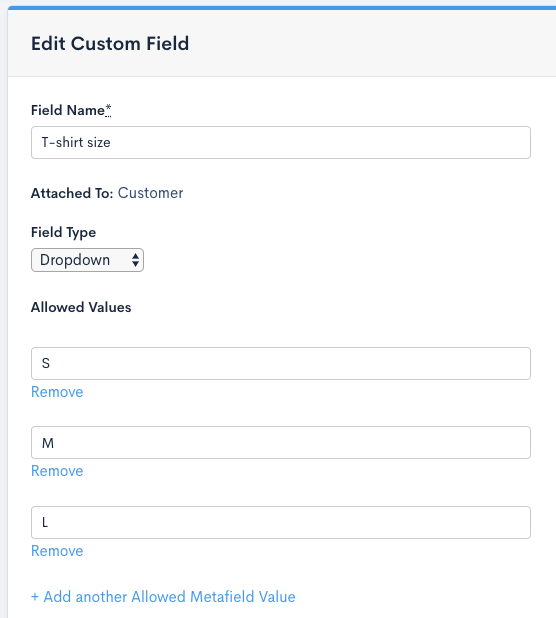
For radio button and dropdown type fields, you can configure the values that the customer is allowed to select.

Add the values you'd like your subscriber to choose.
Example
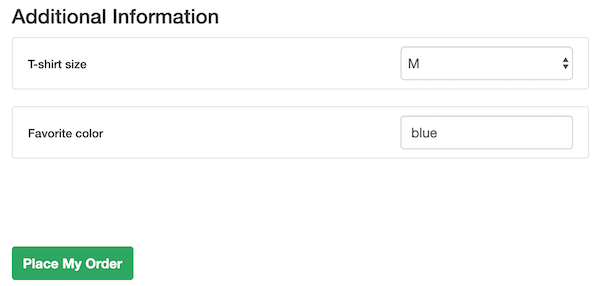
Once you have created a custom field attached to “Subscription” or “Customer”, you will see the option to display it when editing your Public Signup Pages. Once you have done so, you will see the field at the bottom of the signup page:

Display of custom field choices on a Public Signup Page.