In addition to global Public Signup Page settings, Advanced Billing allows granular control over individual Public Signup Pages. View, edit & customize based on your current product offering with just a few simple steps.
To customize your Public Signup Pages’ individual page settings, select the Catalog portion of your Advanced Billing site, then the Public Signup Pages. Select the Edit link next to the Public Signup Page you wish to customize. The information in this page also applies to creating a new Public Signup Page.
Editing Public Signup Pages
After you create a Public Signup Page, Advanced Billing allows you to make changes as needed. Changes to Public Signup Pages will reflect immediately on your site, so testing in sandbox sites is encouraged.
You can view all of your current Public Signup Pages, by selecting the Catalog on the left hand side of your site view.

View all existing Public Signup Pages
View Current Settings
To view the current settings for your Advanced Billing Public Signup Page, select, View from the current page you’d like to inspect. This “view” option will allow to preview the current settings for your Public Signup Page, from a read-only perspective.

View current settings for your Public Signup Page

View overview of settings for your Public Signup Page
View Current Page
If you’d like to view what your current subscriber sees when they visit your Public Signup Page, select “View URL” on the current page. Then select the URL for your Public Signup Page and open it in a new tab or window.
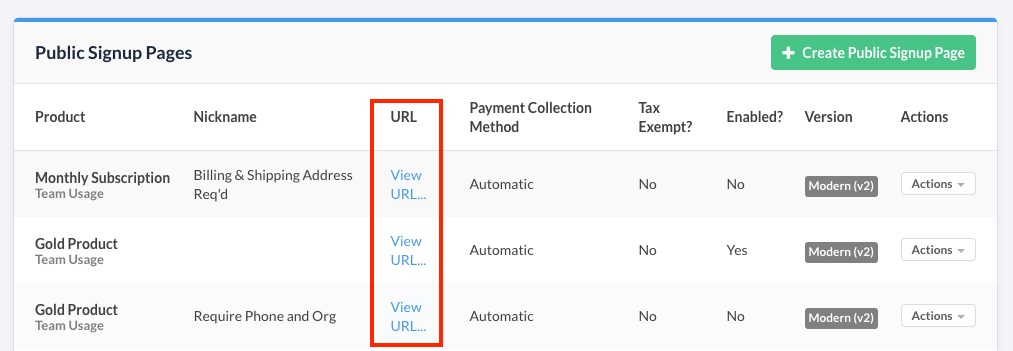
View current URL for your Public Signup Page
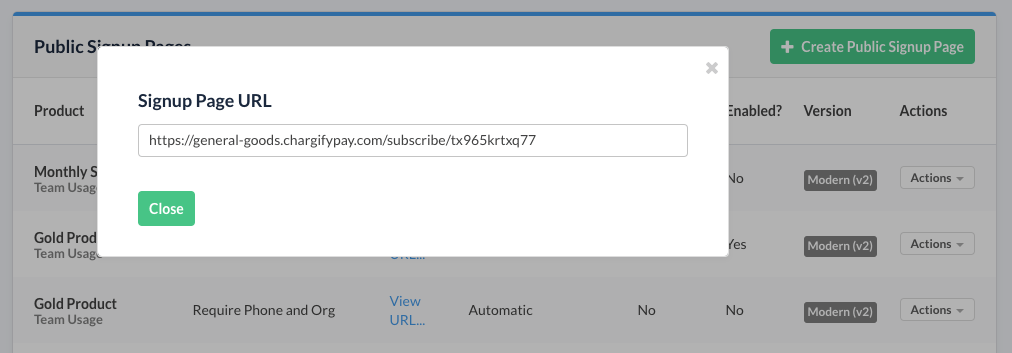
Current URL of Public Signup Page
Edit Current Settings
To begin editing an individual Public Signup Page’s settings, select Edit from the dropdown menu next to the page. You’ll find in-depth instructions below on how to control each setting for a Public Signup Page.

Edit a Public Signup Page
Disable Current Page
You can instantly disable a Public Signup Page in your site at any time. Select “Disable” from the “Actions”

Disable a Public Signup Page
Once a page is disabled, it will not be viewable by anyone with the URL. If someone attempts to view the disabled Public Signup Page, they will receive the following alert:
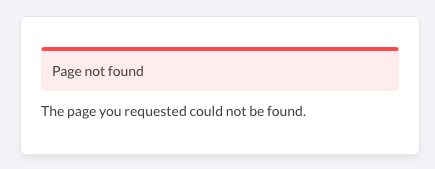
Result of viewing a disabled Public Signup Page
Delete Current Page
If you’d like to delete a Public Signup Page, you may do this from the View option listed above.

Delete a Public Signup Page
Default Settings
Advanced Billing allows you to control the global settings for all Public Signup Pages. However, individual Public Signup Pages can be customized as needed. Select use default next to any of the following options to use the default global Public Signup Page settings.
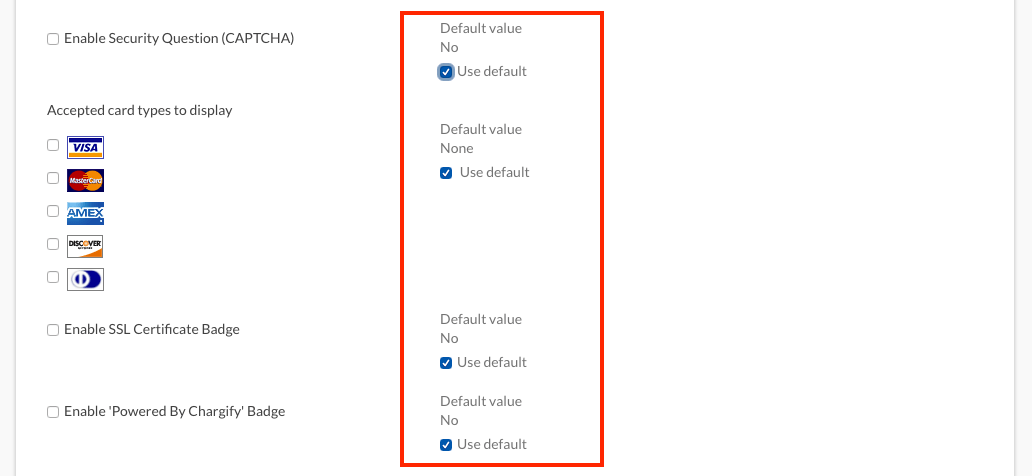
- Page Title
- Logo
- Home Link URL
- Privacy Policy URL
- Terms and Conditions URL
- Custom CSS
- Custom JavaScript
- Enable Security Question (CAPTCHA)
- Accepted Card Types to Display
- Enable ‘Powered By Advanced Billing’ Badge.
For each of those settings, you’ll have the option to either use the default value or set an individual value for that Public Signup Page. For more information on what these settings are for, please see our Public Signup Page Default Settings here.
The Use Default option will initially be checked for you. If you wish to edit a setting with a value that’s different from the default one, you’ll need to first uncheck the Use Default option so you can edit the corresponding form field.
For more information on those settings, please see Public Page Default Settings.
Currency
If you have defined multiple currencies on your site, you’ll see the option to select a currency for your public signup page. All catalog items assigned to the page must support the selected currency otherwise an error will be display when trying to create or update it.
The currency selected here is the currency subscriptions will sign up on. You will need to define one public signup page for each currency that you want to support.

Select currency for your Public Signup Page
Product
Every Public Signup Page is attached to one of your products. For information on creating and managing products, please see products intro.

Select the product to feature on your Public Signup Page
Product Price Point
It’s possible to select which product price point a public signup page should use. By default, the public signup page will use whatever the current default is for the product. This price point will float with the product - if you update the product’s default price point, the public signup page will use the new default.
If you’d like to lock the public signup page to the current default or a specific price point, use the selector to choose the price point you’d like to use.
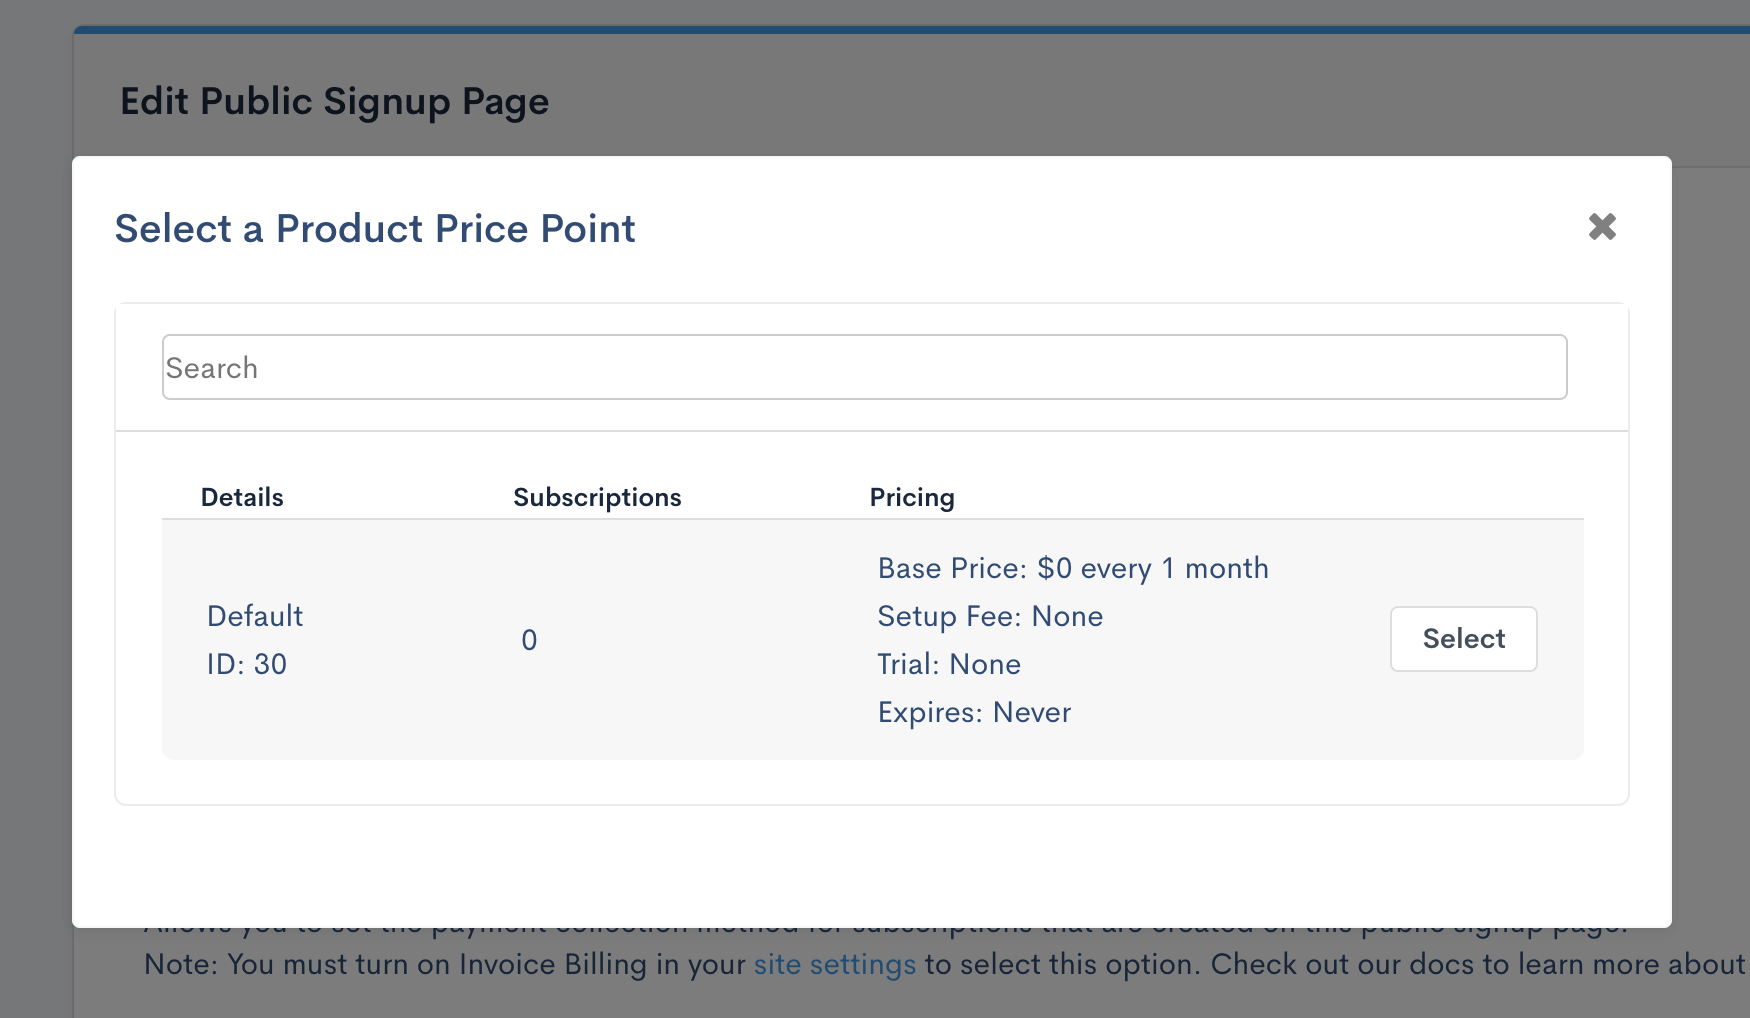
Selecting a product price point
Layout Version
Choose between the classic (v1) and modern (v2) layout versions. Although both layouts have the same features, the modern layout is responsive, mobile friendly, and has an improved user experience.

Toggle the layout version for your Public Signup Page
Payment Collection Method
Select how you would like your customers to be billed: automatically or by invoice/remittance.
For legacy statement-based users, please note that you must enable invoice billing in your site settings in order to be able to select invoice. Also, if you have selected to bill by invoice only or automatic only in your site settings, you will not be able to select a different option from the dropdown here.
The prepaid collection method is not an option at this time.

Set the payment collection method for your signup page
Calendar Billing
By using calendar billing, you can lock all subscriptions created through that Public Signup Page so that they will be billed on the day of the month you choose. In addition to that, new subscriptions will receive an initial prorated charge which is calculated upon the subscription’s creation according to the remaining number of days until the chosen date.

Decide if you'd like to use calendar billing or not
If you don’t need to specify a billing date for all new subscriptions, just leave the option ‘Bill based on the signup date’ selected and Calendar Billing will not be in effect.
For more details on calendar billing, please see Billing Dates: Calendar Billing
Page Nickname
The page nickname is a freely-chosen name that merchants can personally use to identify their Public Signup Pages. Feel free to assign nicknames that mean something to you.

Set a page nickname for your Public Signup Page
Configure Components
Select which components can be configured by a subscriber via Public Signup Pages. Only the components associated with the selected product above will be shown on this Public Signup Page.

Enable/disable components to be featured on your signup page
Note that unless this flag is turned on, it will also not be possible to pre-populate a value for the component via URL, or otherwise manually define a value with JavaScript. In other words, this feature determines whether the component can be added through any means to a subscription – pre-populated by a member of your team, or chosen by the subscriber – through a given Public Signup Page.
Configure Components Price Points
If the component has more than one price point, the price point to use for this Public Signup Page can be selected from the dropdown menu. The price point selected will be the only price point available for purchase on the signup page itself.

Select the price point you'd like to feature
Page Title
Give your Public Signup Page a title that will be displayed at the top of the page.

Enter a page title that will be displayed to your subscribers
Upload your Logo
Elect to use the default logo for all of your Public Signup Pages. To customize individual Public Signup Pages, simply uncheck use default and upload a new logo.

Home Link URL
Give your subscribers the option to click on the logo to be redirected back to the home page.

Designate a home URL for your site. Must begin with 'http://' or 'https://'.
Privacy Policy URL
A link to the privacy policy will appear in the footer of the Public Signup Page.

Enter a URL that will send a subscriber to your privacy policy page. Must begin with 'http://' or 'https://'.
Terms and conditions URL
If a link to terms is a provided the customer will be required to agree to the terms before subscribing. A link to the terms will also appear in the footer.

Enter a URL that will send a subscriber to your terms and conditions page. Must begin with 'http://' or 'https://'.
Custom CSS
The “Public Page Default Settings” tab also provides input fields to collect custom CSS and JavaScript for your site for both of the layout versions. Content in the CSS field will be included at the top of the page in a stylesheet tag.
We’ve put together a guide for using your own Customer Javascript and CSS for the Modern and for Classic Public Signup Pages.

NOTE: Please note that this feature is only available on paid accounts. If you need access during onboarding, please contact us”
Custom JavaScript
Custom JavaScript will be included at the bottom of the page and wrapped in a script tag.

Enter custom JavaScript for your signup page
NOTE: Please note that this feature is only available on paid accounts. If you need access during onboarding, please contact us”
Enable Security Question
A CAPTCHA is a challenge-response test that is used to verify that the Public Signup Page is being submitted by a human and not a computer. This is helpful in preventing hackers from using the Public Signup Page for malicious reasons. It is highly recommended that you enable this option. If enabled, we will provide a reCAPTCHA style input form to your page.

For more information, visit Google’s page on reCAPTCHA.
Accepted Card Types to Display

Select which card logos will appear on the signup page
Enable ‘Powered by Advanced Billing’ Badge
If you enable the following in your individual page settings, Advanced Billing will display a logo showing that Advanced Billing powers your payments and link to extra info about security for your customers.

Select the option to display "Powered by Advanced Billing"

Example of "Powered by Advanced Billing" badge
Display Coupon Field?
By checking this option, you can request a coupon in your Public Signup Pages. For more information on coupons, please see coupons.

Display Referral Field?
By checking this option, you will present the subscriber with an option to enter a referral code provided to them via another subscriber from your site. In order for the code to be valid, the referrals feature must be enabled. Additionally, the subscription providing the referral code must be in the Active state. Referral codes from trialing subscriptions are not valid referral codes.

Fix
For more information on referrals, please see our full documentation here.
Credit Card Settings
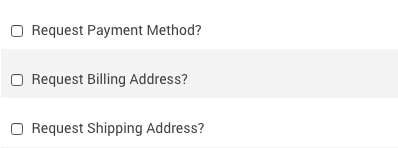
Option to require payment methods, billing address or shipping address
Each of those three settings manage whether a payment method, a billing address and a shipping address fields should be present at the Public Signup Page. Please keep in mind that these settings may be influenced by the following corresponding product settings:
- Require Payment method
- Require Billing address
- Require Shipping address
If you checked any of the options above in the product settings, then the corresponding options in the Public Signup Page have to be checked:
- Request Payment method
- Request Billing address
- Request Shipping address
On the settings page for a product you can determine whether or not you want to collect the shipping and billing address information for the user. When an address is ‘requested’, the fields appear on the page but are not required. Clicking the ‘require’ checkbox will make the fields mandatory.
Request Payment Method
The following setting will require a payment method to be added to a Public Signup Page in order to successfully signup. You may wish to disable this if you are offering a $0.00 product.

A payment method must be supplied upon signup
Request Billing Address
The following setting will require a billing address to be added during signup. Pay especial attention to this field if you are basing your tax calculations off Billing Address.

A full billing address must be supplied upon signup
Request Shipping Address
The following setting will require a shipping address to be added during signup. Just like “Billing Address”, shipping can be used to calculate tax.
Pay especial attention to this field if you are basing your tax calculations off Shipping Address.

A full shipping address must be supplied upon signup
Return URL after successful signup
The Return URL after successful signup is the URL that the user will be redirected to after they subscribe using the Public Signup Page. The Return parameters specify the data that will be passed back in the query string of both Return URLs (i.e. it is shared between both URLs).

Enter the URL you'd like your subscriber to be redirected to after successful signup
Return Parameters
When creating or editing a Public Signup Page, you may specify a Return parameters.
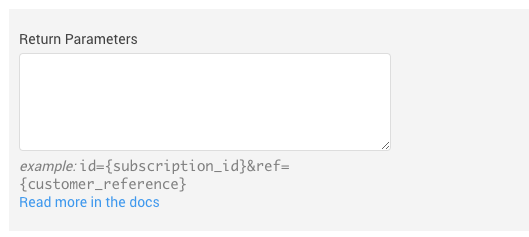
Specify return parameters for your redirect URL
The available parameters are:
subscription_id: The Advanced Billing generated unique identifier for the subscription that was createdcustomer_id: The Advanced Billing generated unique identifier for the customer that was createdcustomer_reference: Your unique reference if one was sent in the pre-populated dataproduct_handle: The product API handleproduct_id: The Advanced Billing generated unique identifier for the productsignup_revenue: The revenue, formatted as a string of decimal separated dollars and cents, from the subscription signup ($50.00 would be formatted as 50.00)signup_payment_id: The ID of the transaction that generated the revenue Return parameters are specified using a single brace around the name of the parameter and separated with an ampersand.
For example, a Return URL of:
http://example.com/callbackWith these Return parameters:
subscription_id={subscription_id}&customer_reference={customer_reference}Would result in the URL:
http://example.com/callback?subscription_id=1&customer_reference=1234Note: Return parameters should not be considered authoritative. Granting irrevocable access to users based on these values is not advised. They should be considered hints until the user is verified via a secure API read.
Tax Exempt
Creates customers marked as tax exempt when this flag is true. The implication of this is that when subscription billing processes are run, all taxable items will be ignored.

Decide if your Public Signup Page should be tax exempt
Custom Fields
Custom fields that you’ve previously created can be configured to appear individually on your Public Signup Pages. To enable a custom field to appear on the Public Signup Page, check the corresponding option in the list above.

Control what custom fields appear on your signup page
Components
Quantity and on/off components can be configured to appear on the Public Signup Page. To enable a component on the Public Signup Page, check the corresponding option in the list above. Components with stairstep pricing schemes are not currently supported on the Public Signup Page.
Once enabled, components will appear in a Configure Your Plan section on the Public Signup Page in a div that can be targeted by the class name based on your layout version:
Modern
Uses the class name of form__section--configure-plan. (Note that this name may change in the future).
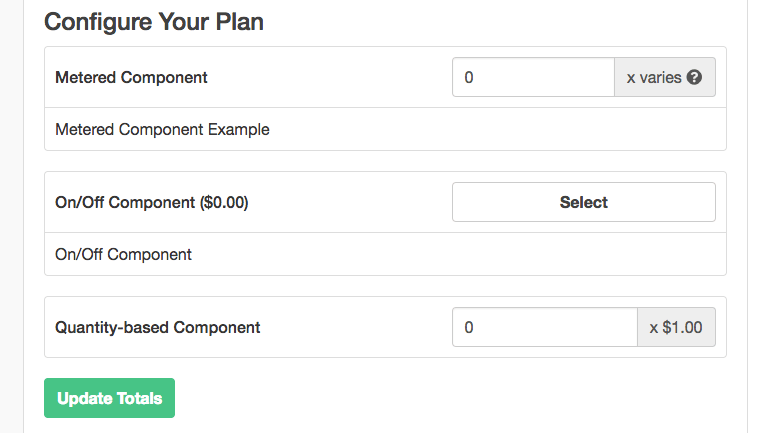
View of components on a modern page
Classic
Uses the class name of component_configuration. (Note that this name may change in the future).
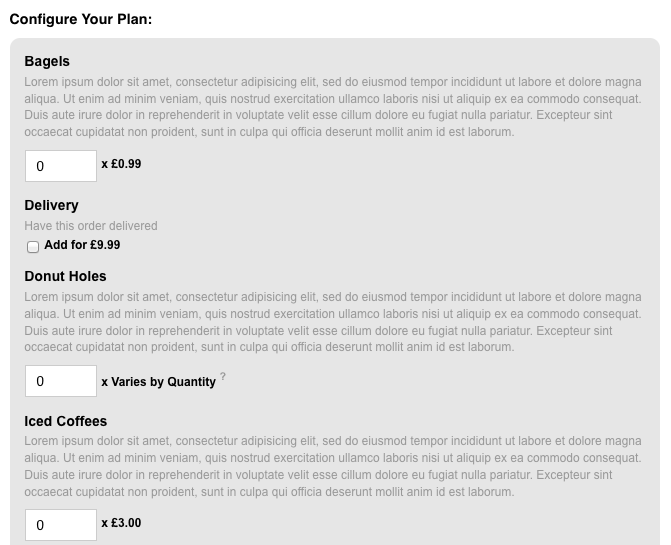
View of components on a classic page