Event-Based Components
Billing for events is accomplished using the Event-Based Component, which is an event-connected member of the standard Advanced Billing component system.
To create an event-based component:
- Navigate to Catalog > Products and click “Create Component” (within the correct product family)
- Choose “Event Based Component” (Figure 1)
- Define your component as usual, while also selecting or creating a metric on which to bill (Figure 2)
Note: standard component options are described in the component documentation.
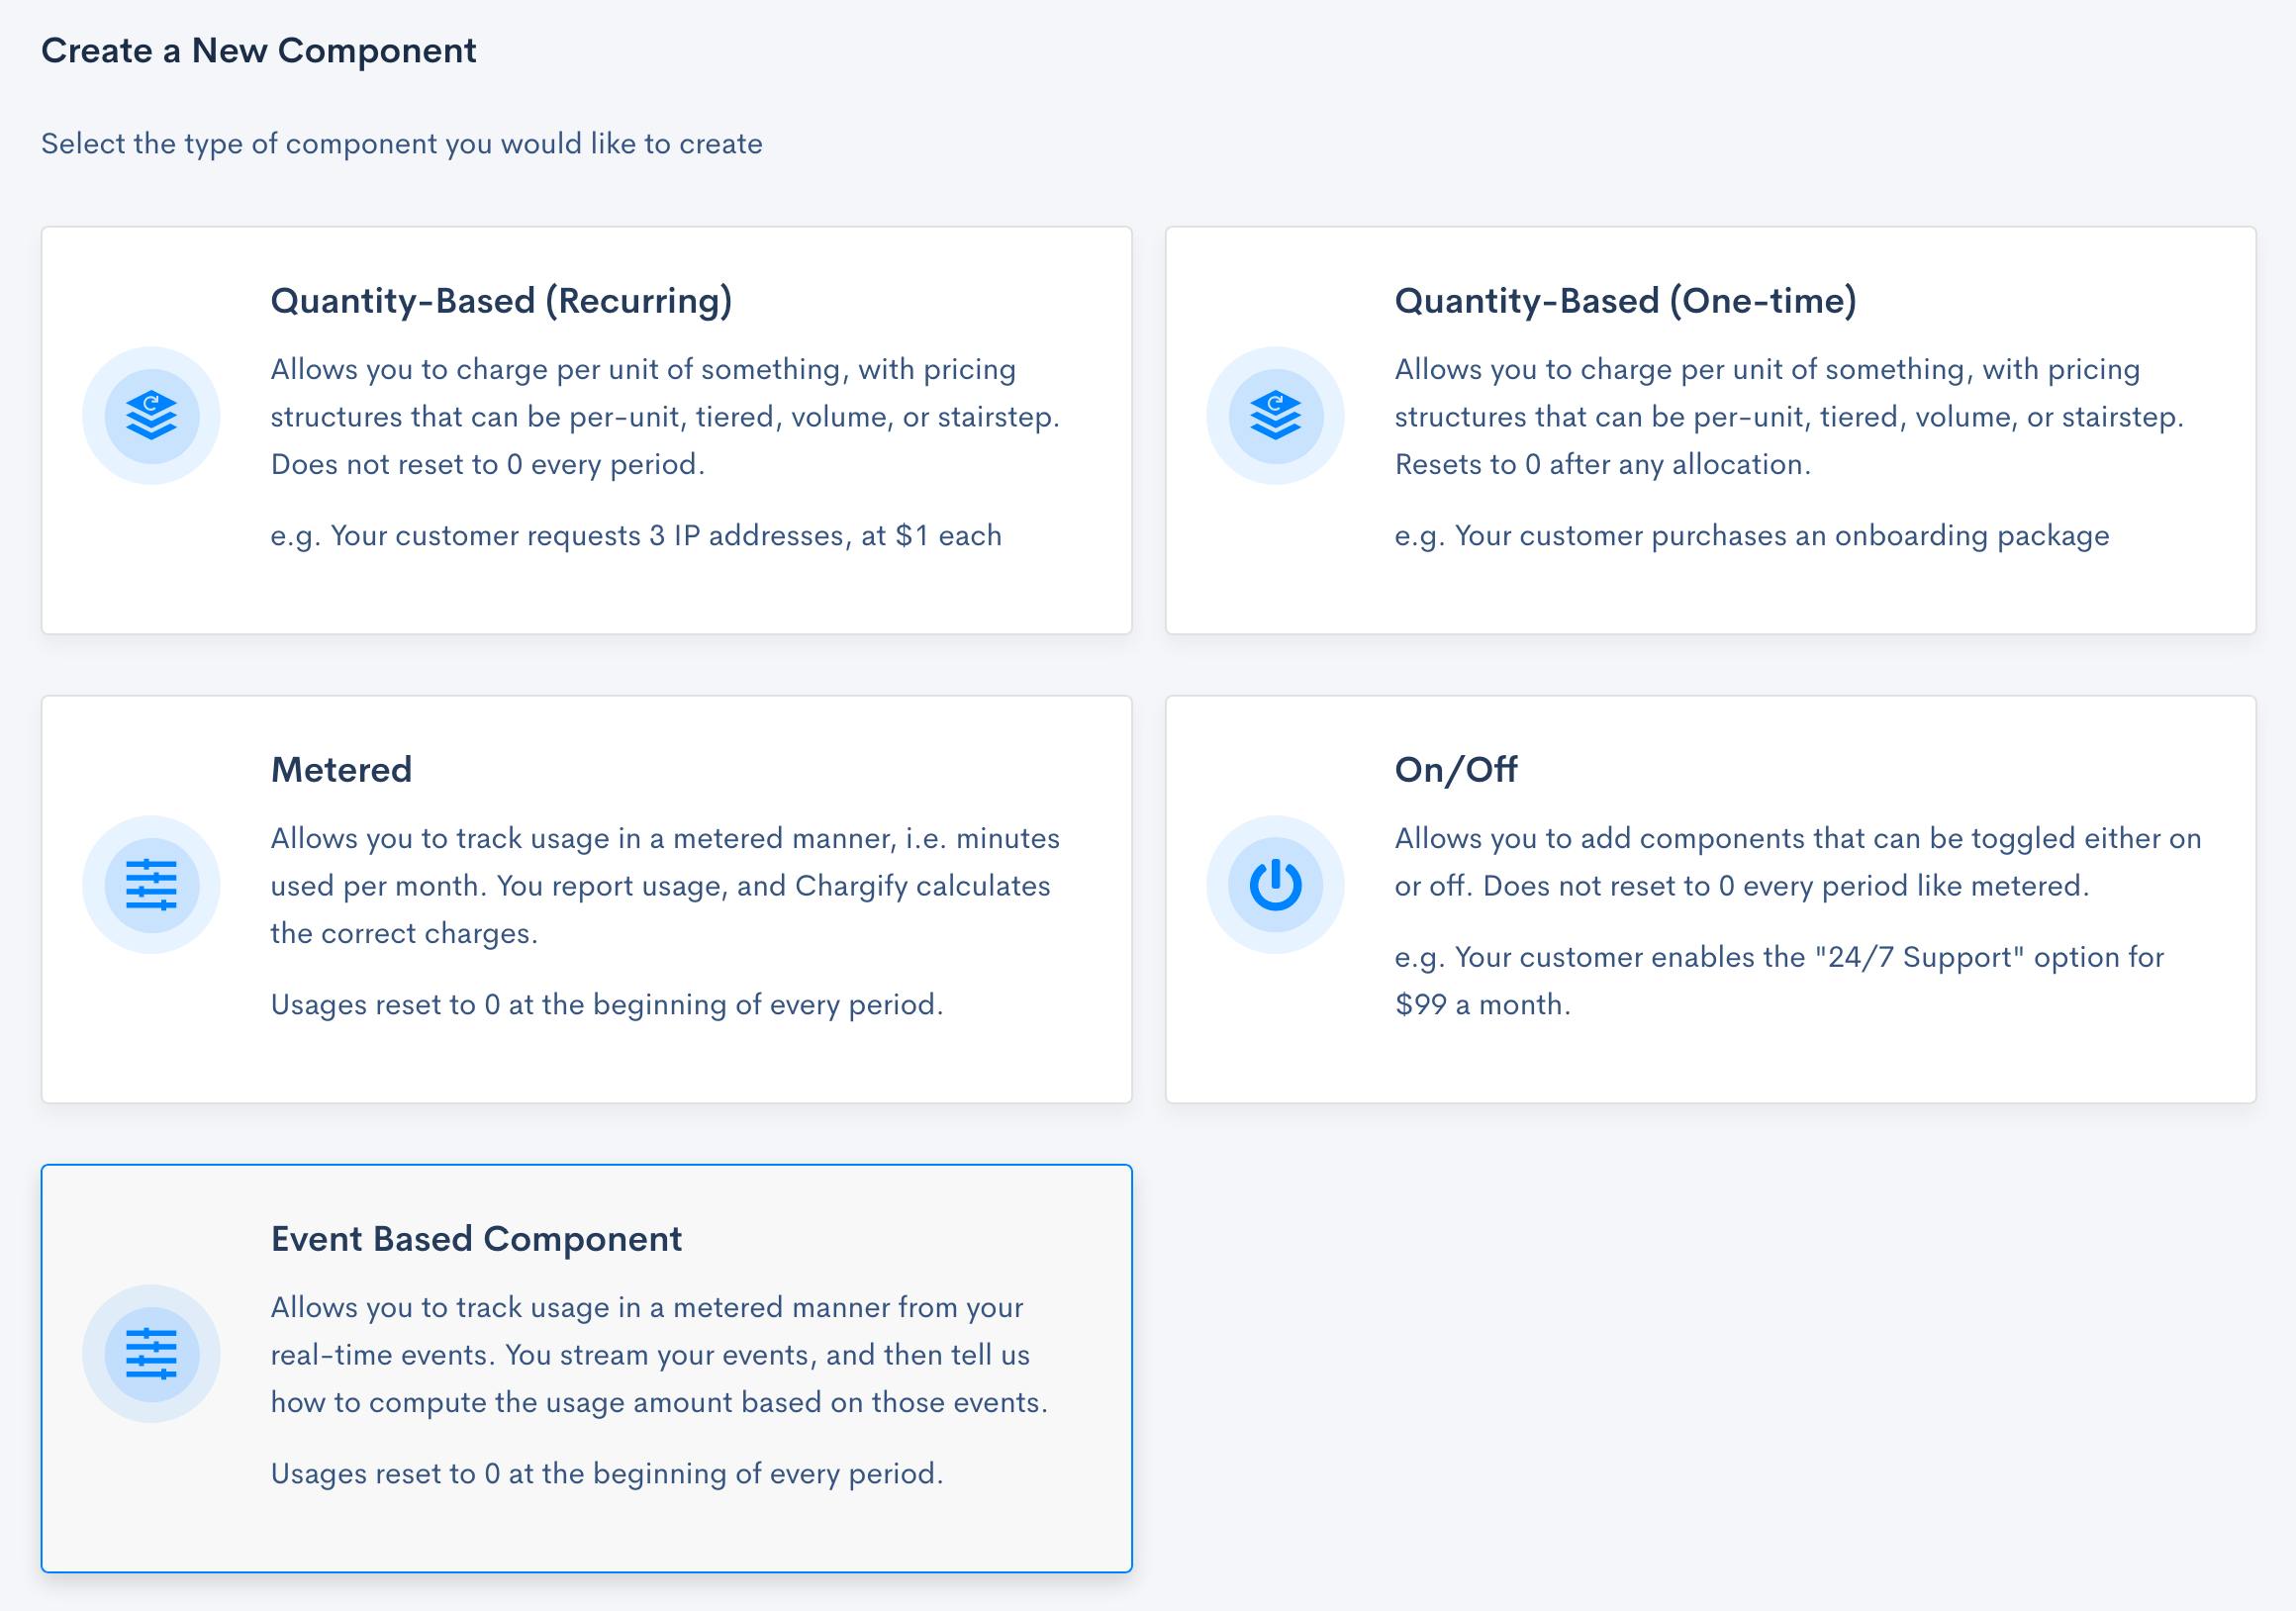
Figure 1: Choose the Event-Based Component type
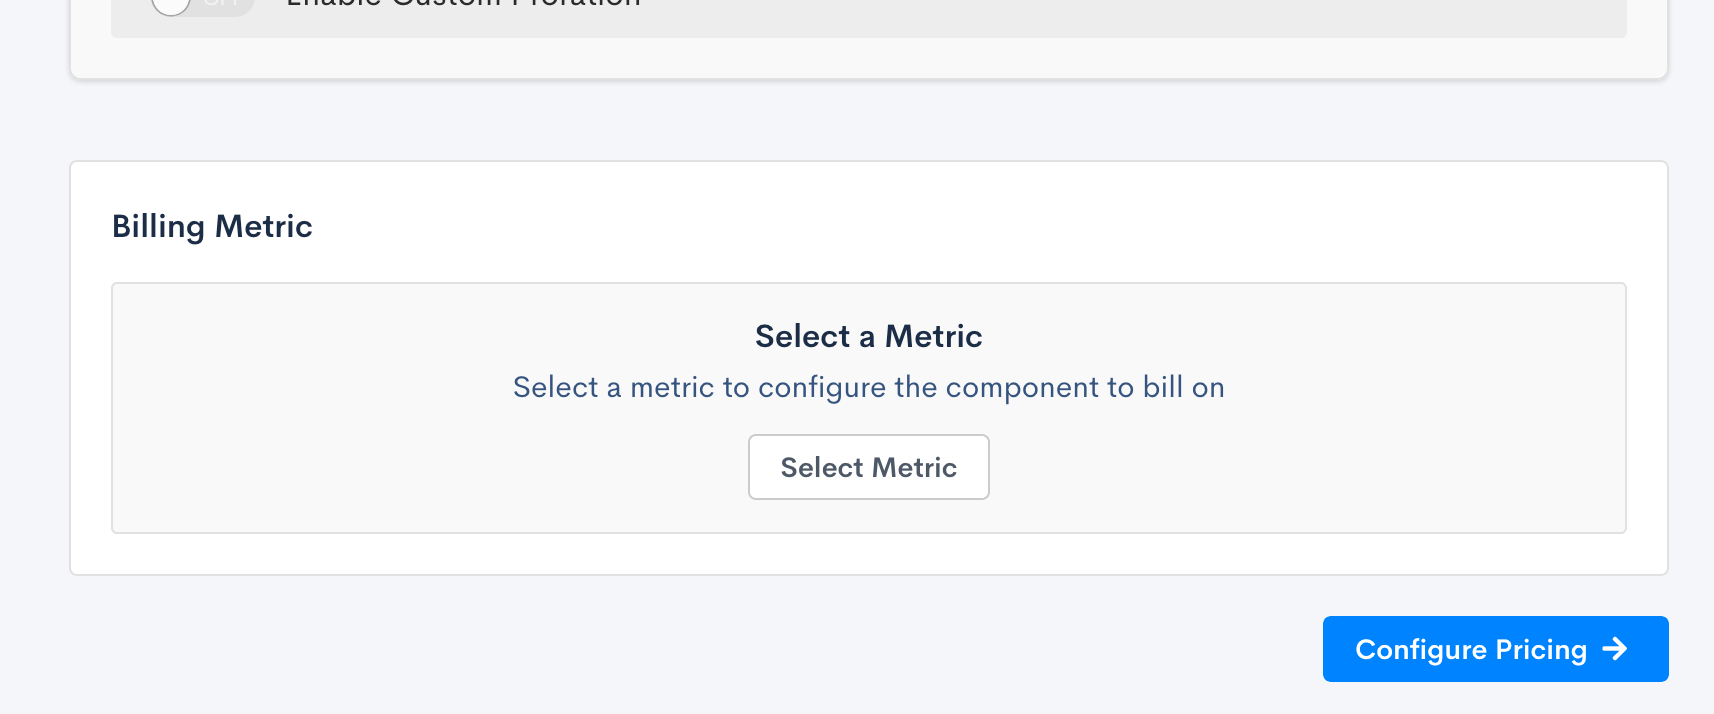
Figure 2: Select the metric for billing
The Role of Metrics in Billing
In general, all metered billing involves creating charges for the amount of something that was used or consumed in a service. Metrics provide a flexible way to answer “how much” was used based on your events. At the end of every billing period when Advanced Billing computes the subscription charges, we will compute the metric value for the subscriber over the billing period to find the quantity that will be billed.
Examples
Bill based on API calls made to your service.
Send an event to Advanced Billing for every API call made to your service. Then, create a metric that simply counts the number of events in the stream, and choose that metric for the component.
Bill based on the total number of phone call minutes consumed by your customers.
Send an event to Advanced Billing at the end of every call with a duration property. Then, create a metric that sums the duration property, and choose that metric for the component.
Bill based on the average number of licenses provisioned over the billing period.
Send an event to Advanced Billing every day with a license_count property. Then, create a metric that takes the average of the license_count property, and choose that metric for the component.
Subscription Identification
In classic Advanced Billing metered usage, the usage data is reported to our API at subscription-specific API endpoints. Event data, on the other hand, is sent to stream-specific API endpoints. Therefore, in order to bill a subscriber for events, the events themselves must identify to which subscription they belong.
If you wish to bill for an event, the event must contain a property whose value can correlate the event back to a subscription. There are 3 ways to achieve this:
- The
chargify.subscription_idproperty. You can include the Advanced Billing Subscription ID in the event data at this property. This requires your system to know the exact Advanced Billing Subscription ID related to the event you are sending. - The
chargify.subscription_referenceproperty. You can include a Advanced Billing Subscription Reference in the event data at this property. This allows you to use your own system’s identifier for a subscriber (perhaps an “Account ID” or “Customer ID”) in the event data, but you must then sync that identifier to the subscription reference field in Advanced Billing. - A custom property. This method is identical to the previous method, except the identifier can use any property in your event data, e.g.
account.id.
Wherever you choose to identify your subscription must be consistent across the entire stream, and the stream itself must be told where to find the identifier. See Correlating Events to Subscription within the guide on creating streams for more information.
Subscription Periods
Once you have events in your streams which are correlated with a subscription, the last piece of the puzzle required to perform billing is the timerange over which the events will be selected for billing.
At the end of a subscription’s billing period, Advanced Billing will select all events for the subscription whose chargify.timestamp falls between the start of the subscription period (inclusive of that moment) and the end of the subscription period (exclusive of that moment), compute the metric across those events, and bill for the resulting quantity.
Edge Cases
Since you may have many events, and an event timestamp may fall on or near the boundary of a period, it is useful to discuss how Advanced Billing handles events that arrive near those subscription period boundaries.
An event with a timestamp matching the end of a period is billed in the next period.
The timestamp that defines the end of one billing period is the same timestamp that is used at the beginning of the next billing period. Therefore, to ensure that an event is billed only once, we select event inclusive of the period start time and exclusive of the period end time.
Events sent without a timestamp are stamped according to when they are received and processed.
The chargify.timestamp field is optional when you record events. If you do not provide that value, we will assign a timestamp based on the time we receive and process the event. Due to network latency or ingestion latency in our engine, the timestamp we record will be a variable time after you send it from your system. Therefore, you may send an event that actually occurred before the end of a billing period, but is received and processed after the end of that billing period. Such an event would be billed in the next period. If this is unacceptable, you should always provide a value for chargify.timestamp.
Events back-dated with chargify.timestamp can miss a billing cutoff and go unbilled.
If timing of events for billing is important for your application, you should provide an explicit chargify.timestamp value (see Event Timestamps in the Getting Data In Guide).
When back-dating events, it is possible to send an event with a timestamp relating to a previous period, according to wall-time. For example, you may send an event timestamp of the last second of 2019 (2019-12-31T11:59:59Z) for a subscription with period ending in the first second of 2020 (2020-01-01T00:00:00Z), but the event is received into Advanced Billing’s data stores 30 seconds after the start of 2020 (2020-01-01T00:00:30Z).
Advanced Billing provides a minimum “grace period” of 20 minutes before billing occurs. Following our example above, events back-dated for the previous period will be included for billing as long as the event is received and processed by Advanced Billing within the first 20 minutes of 2020 (i.e. by 2020-01-01T00:20:00Z).
If an event is back-dated in excess of the grace period, there is no guarantee that the event will be included for billing in the target period. In fact, the event may go unbilled! For example, if the event from above is actually received 25 minutes into 2020 (2020-01-01T00:25:00Z) while the grace period is set to 20 minutes, billing may have already been finalized for the previous period without that event. Such an event will simply go unbilled. At this time, you will not receive a warning or notification if this occurs. Therefore, if you choose to provide a chargify.timestamp, it is important that you send your events to Advanced Billing quickly - ensure they arrive at Advanced Billing before the grace period expires.
You can specify how long the grace period should be. Go to the Settings > Events-Based Billing menu and set how long it should be in minutes. All the rules described above would still apply, but they will use your value (e.g. 90 minutes instead of the default 20 minutes).
Important Notes:
- Grace Period can vary from 0 up to 120 minutes, based on your setting. The default value is 20 minutes.
- Due to variances in processing, the actual grace period can be expanded an additional 20 minutes (at most).
- This grace period only applies to subscriptions with active event-based billing.
Setting prices
Component pricing is done in the same way as for all components. You can choose per-unit, volume, tiered, or stairstep pricing. The quantity to bill is derived from the metric, and that quantity is used to find the appropriate price to charge. See Pricing Schemes Explained in the component documentation for more.
Multi-Attribute and Segment Rating
If you have selected a segmented metric for your component, you will be able to define a different rate for as many of your segment attributes as needed.
The initial price you provide will be your default rate. This rate will apply to any event that does not match any of your other rates.
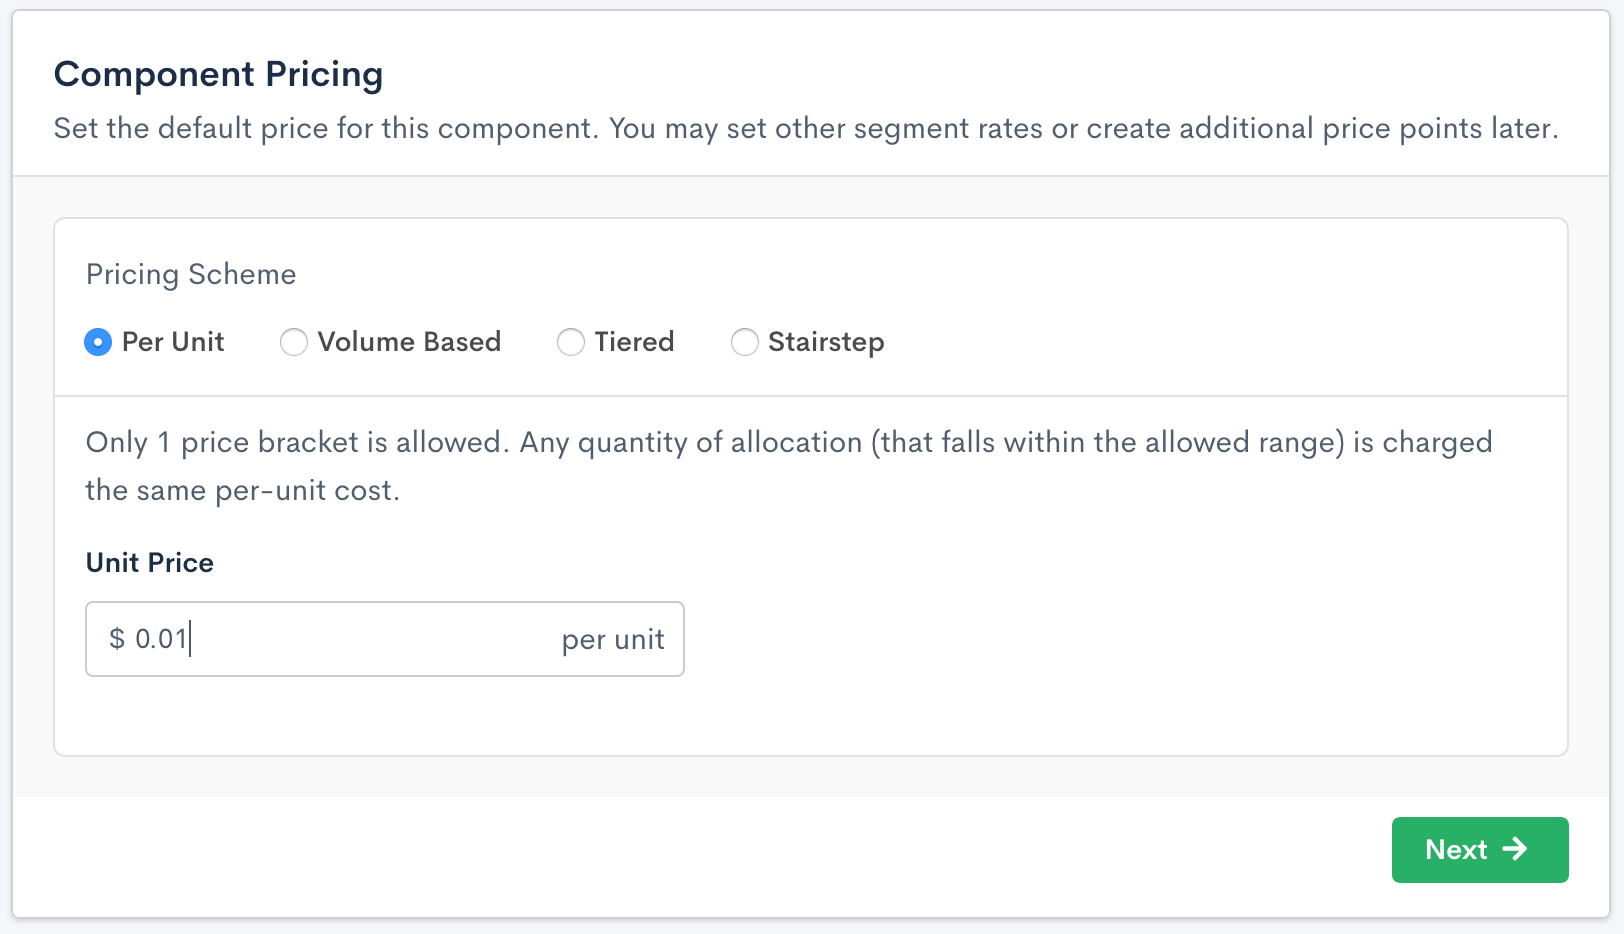
Setting the default price for multi-attribute rating
Click “Next” to move on and define the rest of your rates. You will now see your default price (marked by the “*” tag) and a form to add additional segments.

Adding segments for multi-attribute rating
Segments are a combination of an attribute value and a rate. Create as many segments as you need to define pricing for the unique values you expect in your segmenting attribute. For example, you may create segments for when destination of a message matches “US”, “CA”, and “PL”. Note, that leaving a field blank will insert an “*” which will match any value (you do not need to manually add the “*” yourself).

Define attribute values for each of your segments
After clicking “Add Segment”, you’ll need to set your rates.
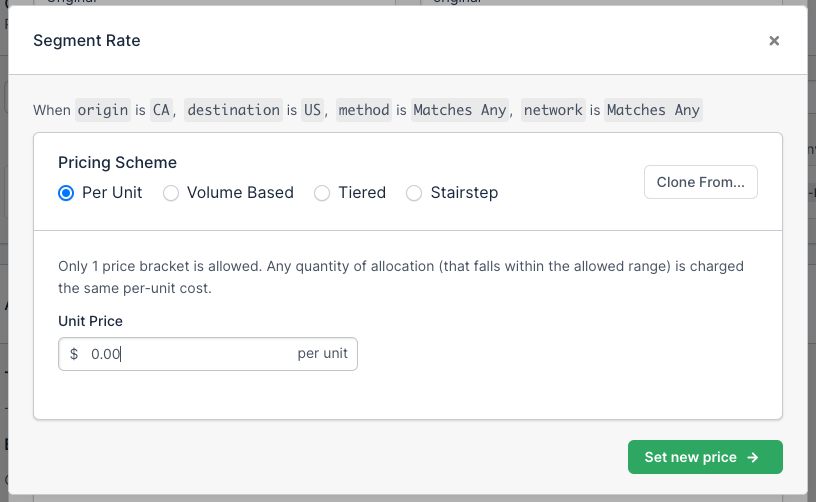
Click "Set Rate" to define your price
You may change any of your rates by simply clicking on the price to expose the price control again.
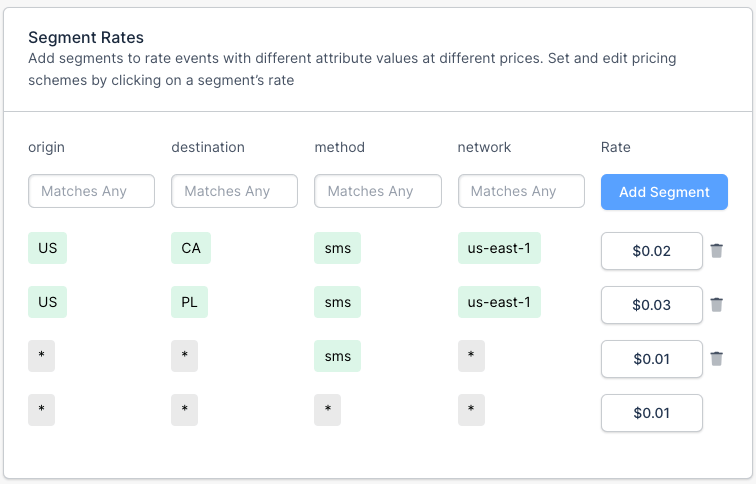
Complete Multi-Attribute pricing
Activating Components For Subscribers
A big difference between metered components and event-based components is that event-based data can exist easily without having to bill for it. With metered components, if you report usage for a subscription, it will be billed. With event-based components, you can report usage (events) without necessarily billing for them.
Therefore, event-based components have the concept of activation. Until you activate a component for billing on an individual subscription, you can view the usage for the metric on the subscription, but it won’t be billed.
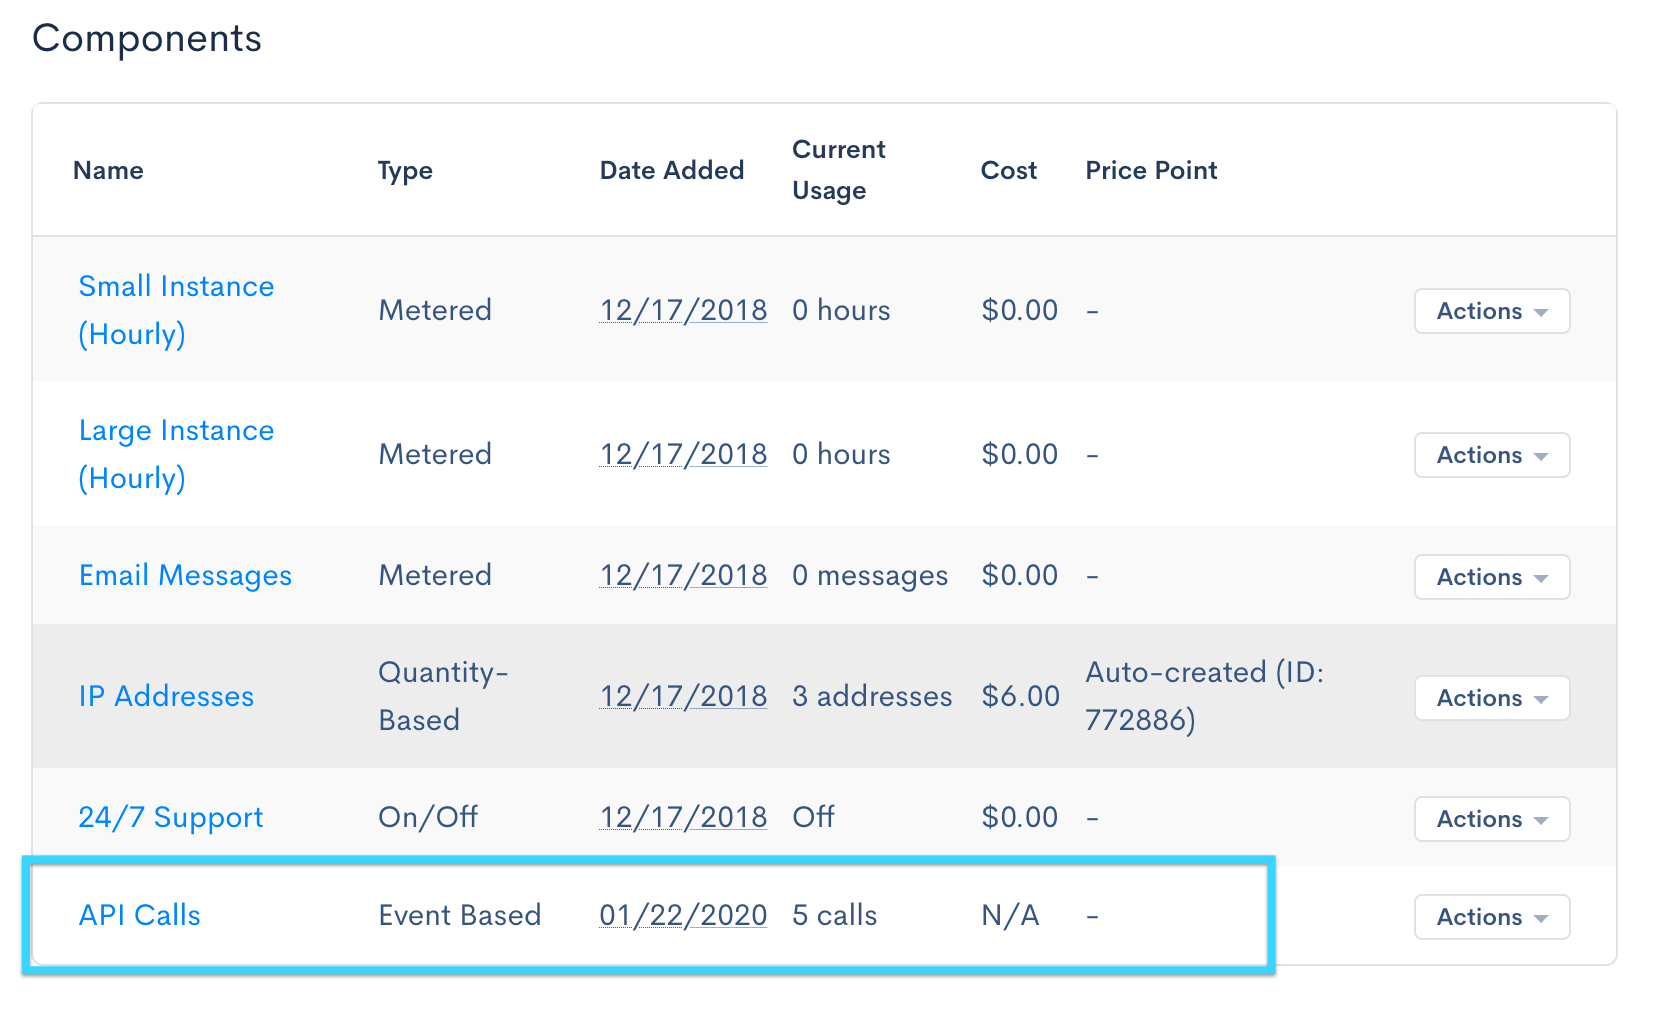
The cost for these 5 API calls is N/A because the component is not activated for billing
When components are activated, the billing will take place at the next normal renewal based on the events that are in place for the period. Billing for event-based components is done in arrears, just like with metered components.
Activating Via The UI
To activate a component for billing:
- From the “Actions” menu on the subscription’s “Component” tab, select “Activate Billing”
- Confirm by clicking “Activate” within the confirmation screen

Select "Activate Billing" for the component
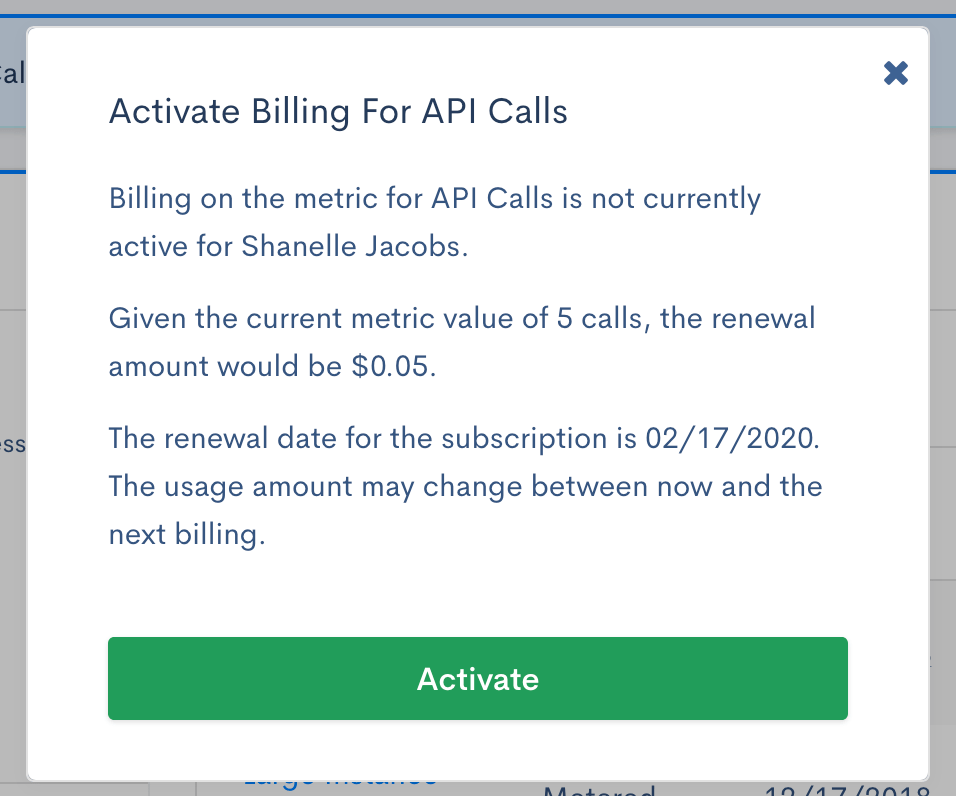
Confirm activation
Deactivating Via the UI
Once billing has been activated, it can also be deactivated. The “Actions” menu for the component will have a “Deactivate Billing” option that replaces the “Activate Billing” option covered above.