How can I control what actions my subscribers can perform?
A merchant can easily control actions by fine-tuning the Billing Portal settings. Simply select or deselect the options you want to enable or disable. This will take effect overall products on your site.
What happens when my customer changes their plan?
If you have enabled “Allow Plan Changes” in the Billing Portal settings, your subscribers have the option of switching to a new plan. Please be aware, all plans within the same family will appear in the Billing Portal.
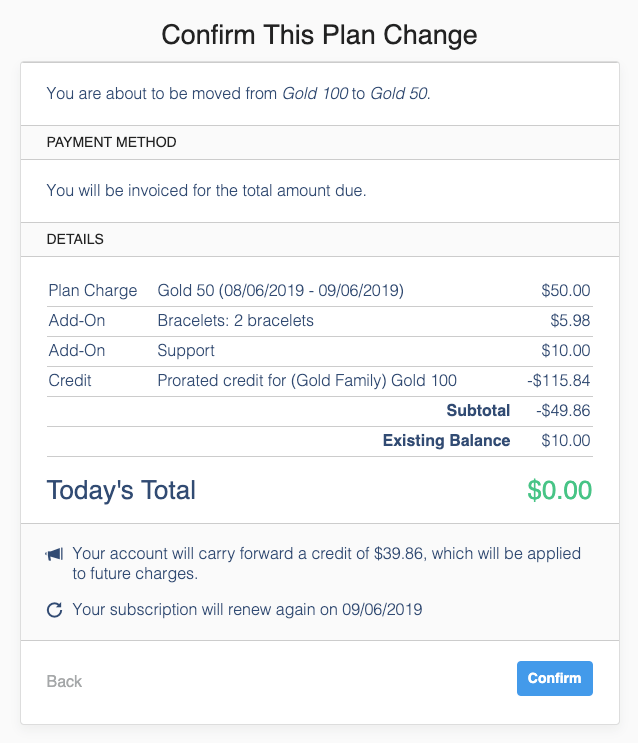
Cost preview and summary of changes for product migration.
The subscriber will be presented with the following information about their change
- Payment Method: Invoice or automatic.
- Details: Your subscriber will be availed of the charges, changes, and any proration credits.
Additionally, the subtotal, existing balance and new charges will be assessed. Any outstanding balance on the subscription will be due at this time if there is a plan change.
Can a customer reactivate a canceled subscription via the Billing Portal?
No, reactivation can only be done through the application or automated via API.
Can I add custom JavaScript and CSS to modify and style the Billing Portal?
Custom CSS can be added to the Billing Portal to modify its appearance, but JavaScript is not supported. You can modify the custom CSS by going to Config > Setting > Billing Portal > Custom CSS. We also support custom JavaScript and CSS on the Public Signup Pages, receipt pages, and Self-Service Pages.
How do I add a logo to the Billing Portal?
This can be done within your Billing Portal settings. Navigate to the “settings” tab and then access the Billing Portal tab on the left side. At the bottom of the section, you will find the option.
How can my subscribers access the Billing Portal if they have not accepted the invitation?
Your portal customers can access the Billing Portal even if they haven’t accepted their invitation email. The exact process depends on whether further email verification is required in your settings.
All you have to do is give them a management URL. These links can be fetched by you, the merchant, from our application or API. They are also available on the statement emails that can be sent to customers.
Note: if the customer has not yet accepted their invitation, in order to fully access the portal they will still have to click on a link that we send to their email address on file - this is a security measure to ensure that management links are only usable by the customer. That said, this verification process can be initiated from the management link. So, the customer can now basically auto-invite themselves, beginning with only a management link.
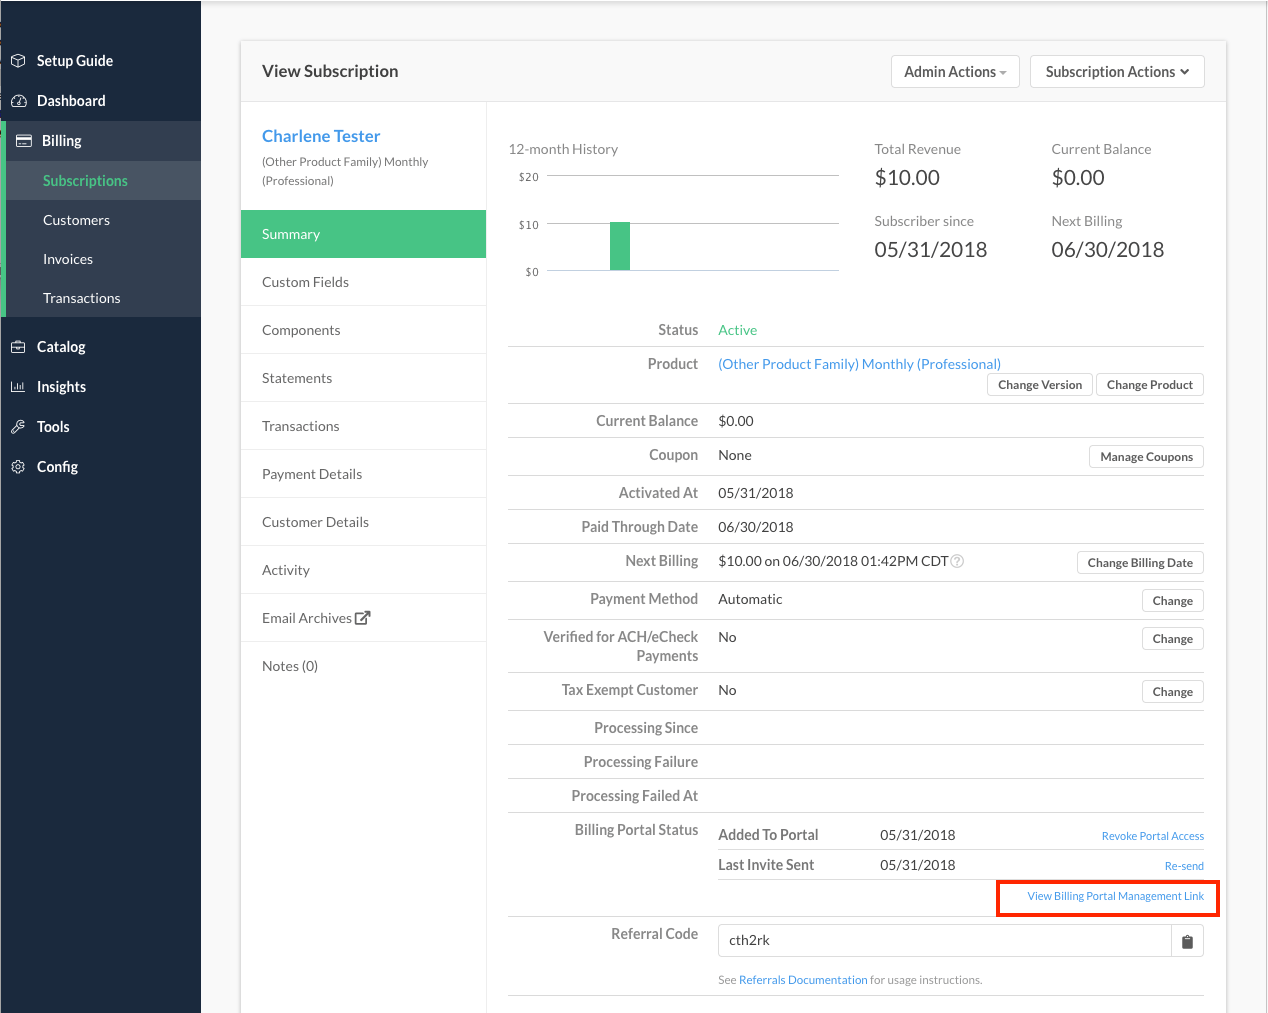
A subscription's personal management URL may be found at the bottom of their subscription within the app.
How do I let my customers self-manage their components in the Billing Portal?
When creating your component, select choose the checkbox to enable user access. This is available for quantity and on/off components (but not for metered) when you are creating your component in the editing window.
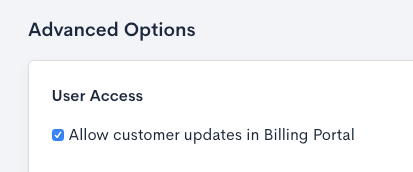
Enable a given component to be available for updates within the Billing Portal.
Under the Billing Portal settings, ensure “Allow Component Changes” is enabled.
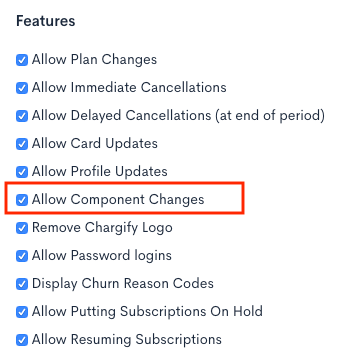
Allow component changes in the Billing Portal.
Inside the Billing Portal, when a user clicks “Configure”, they will see components enabled for user access. They can then self-manage their components.
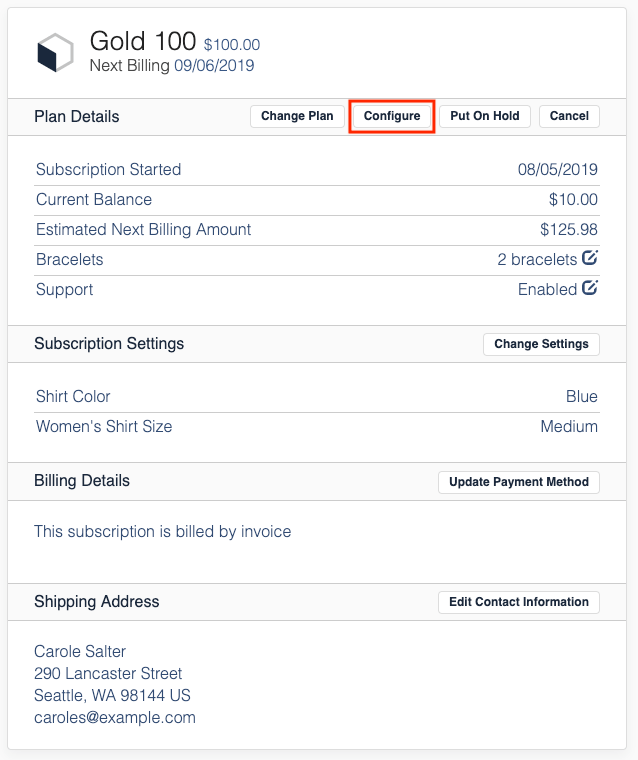
Navigating to the menu for modifying components.
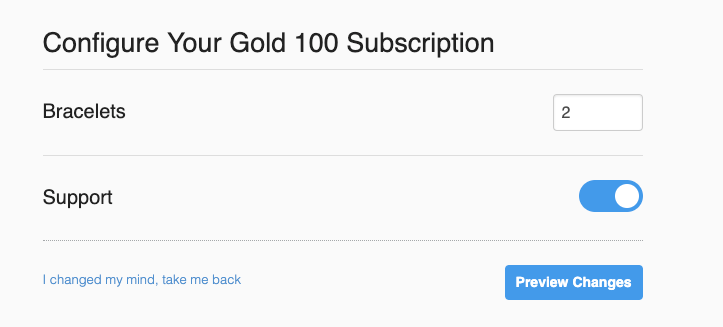
Self-managing a quantity-based and on/off component in the Billing Portal.
What does the Billing Portal management link allow my customer to do?
This link allows your customer to access their subscription on the Advanced Billing Billing Portal. It’s automatically included at the bottom of their statements, invoices, and receipts if they have been invited to the Billing Portal.
We’ll only generate a new link once every 15 days, so there’s no need to come back more often than that.
Your customer may need to have already accepted their invite and logged in to the Billing Portal. If they haven’t, they can be prompted to generate a new login link (much like performing a password reset).
Can I embed the Billing Portal into my website?
Maxio does not allow you to embed the portal on your website. Our security measures protect your subscriber’s credit card and contact information as it is entered. Thus, it is required to use Maxio's servers to process secure information.
Can I configure the Billing Portal to allow only upgrades but not downgrades?
Unfortunately, no you may not. The Advanced Billing Billing Portal allows your customers to upgrade and/or downgrade their plans.
Can I administer the Billing Portal via API?
Absolutely! Please visit our documentation on what can be updated or enabled via the API.
How do I enable the Billing Portal?
Locate the “settings” tab of your account. Once there you will see a tab on the left side labeled “Billing Portal”. Select the “Enabled for this site” radio button to enable it.
For more information, please see the section titled, Enabling the Billing Portal in Billing Portal Settings.
How do I share the Billing Portal with my customer?
You have a few options available within the Advanced Billing application. First, enable the option to automatically email the Billing Portal link to all customers. This will make the process automated so all customers will have a link to the Billing Portal. To enable this option to select the “Automatic invitation emails for new subscribers” radio button in your Billing Portal settings.
Second, you can use the “Manual invitation emails only” option, this will make it so you have to individually invite each subscription. This is done by visiting the subscription once the setting is enabled. Select the “Send Invite” button in the “Billing Portal Status” section of the subscription.
Why is my subscriber’s Billing Portal is displaying the wrong email?
When you update your subscriber’s email address in their customer record, the existing Billing Portal will reflect the original email used to create portal access. To update this simply revoke portal access. Once this step is complete, enable portal access and send an invitation email using the provided check box in the pop-up.