Enabling Revenue Recognition
In order to view your Revenue Recognition Reports, they will need to be generated first. Click the Enable Revenue Recognition button to turn on Revenue Recognition. Generating your Revenue Recognition reports may take some time. You will receive an in-app notification when the process is complete.

You will see the message above while your reports are being generated

You will receive a new notification once your reports are ready
Revenue Deferral Settings
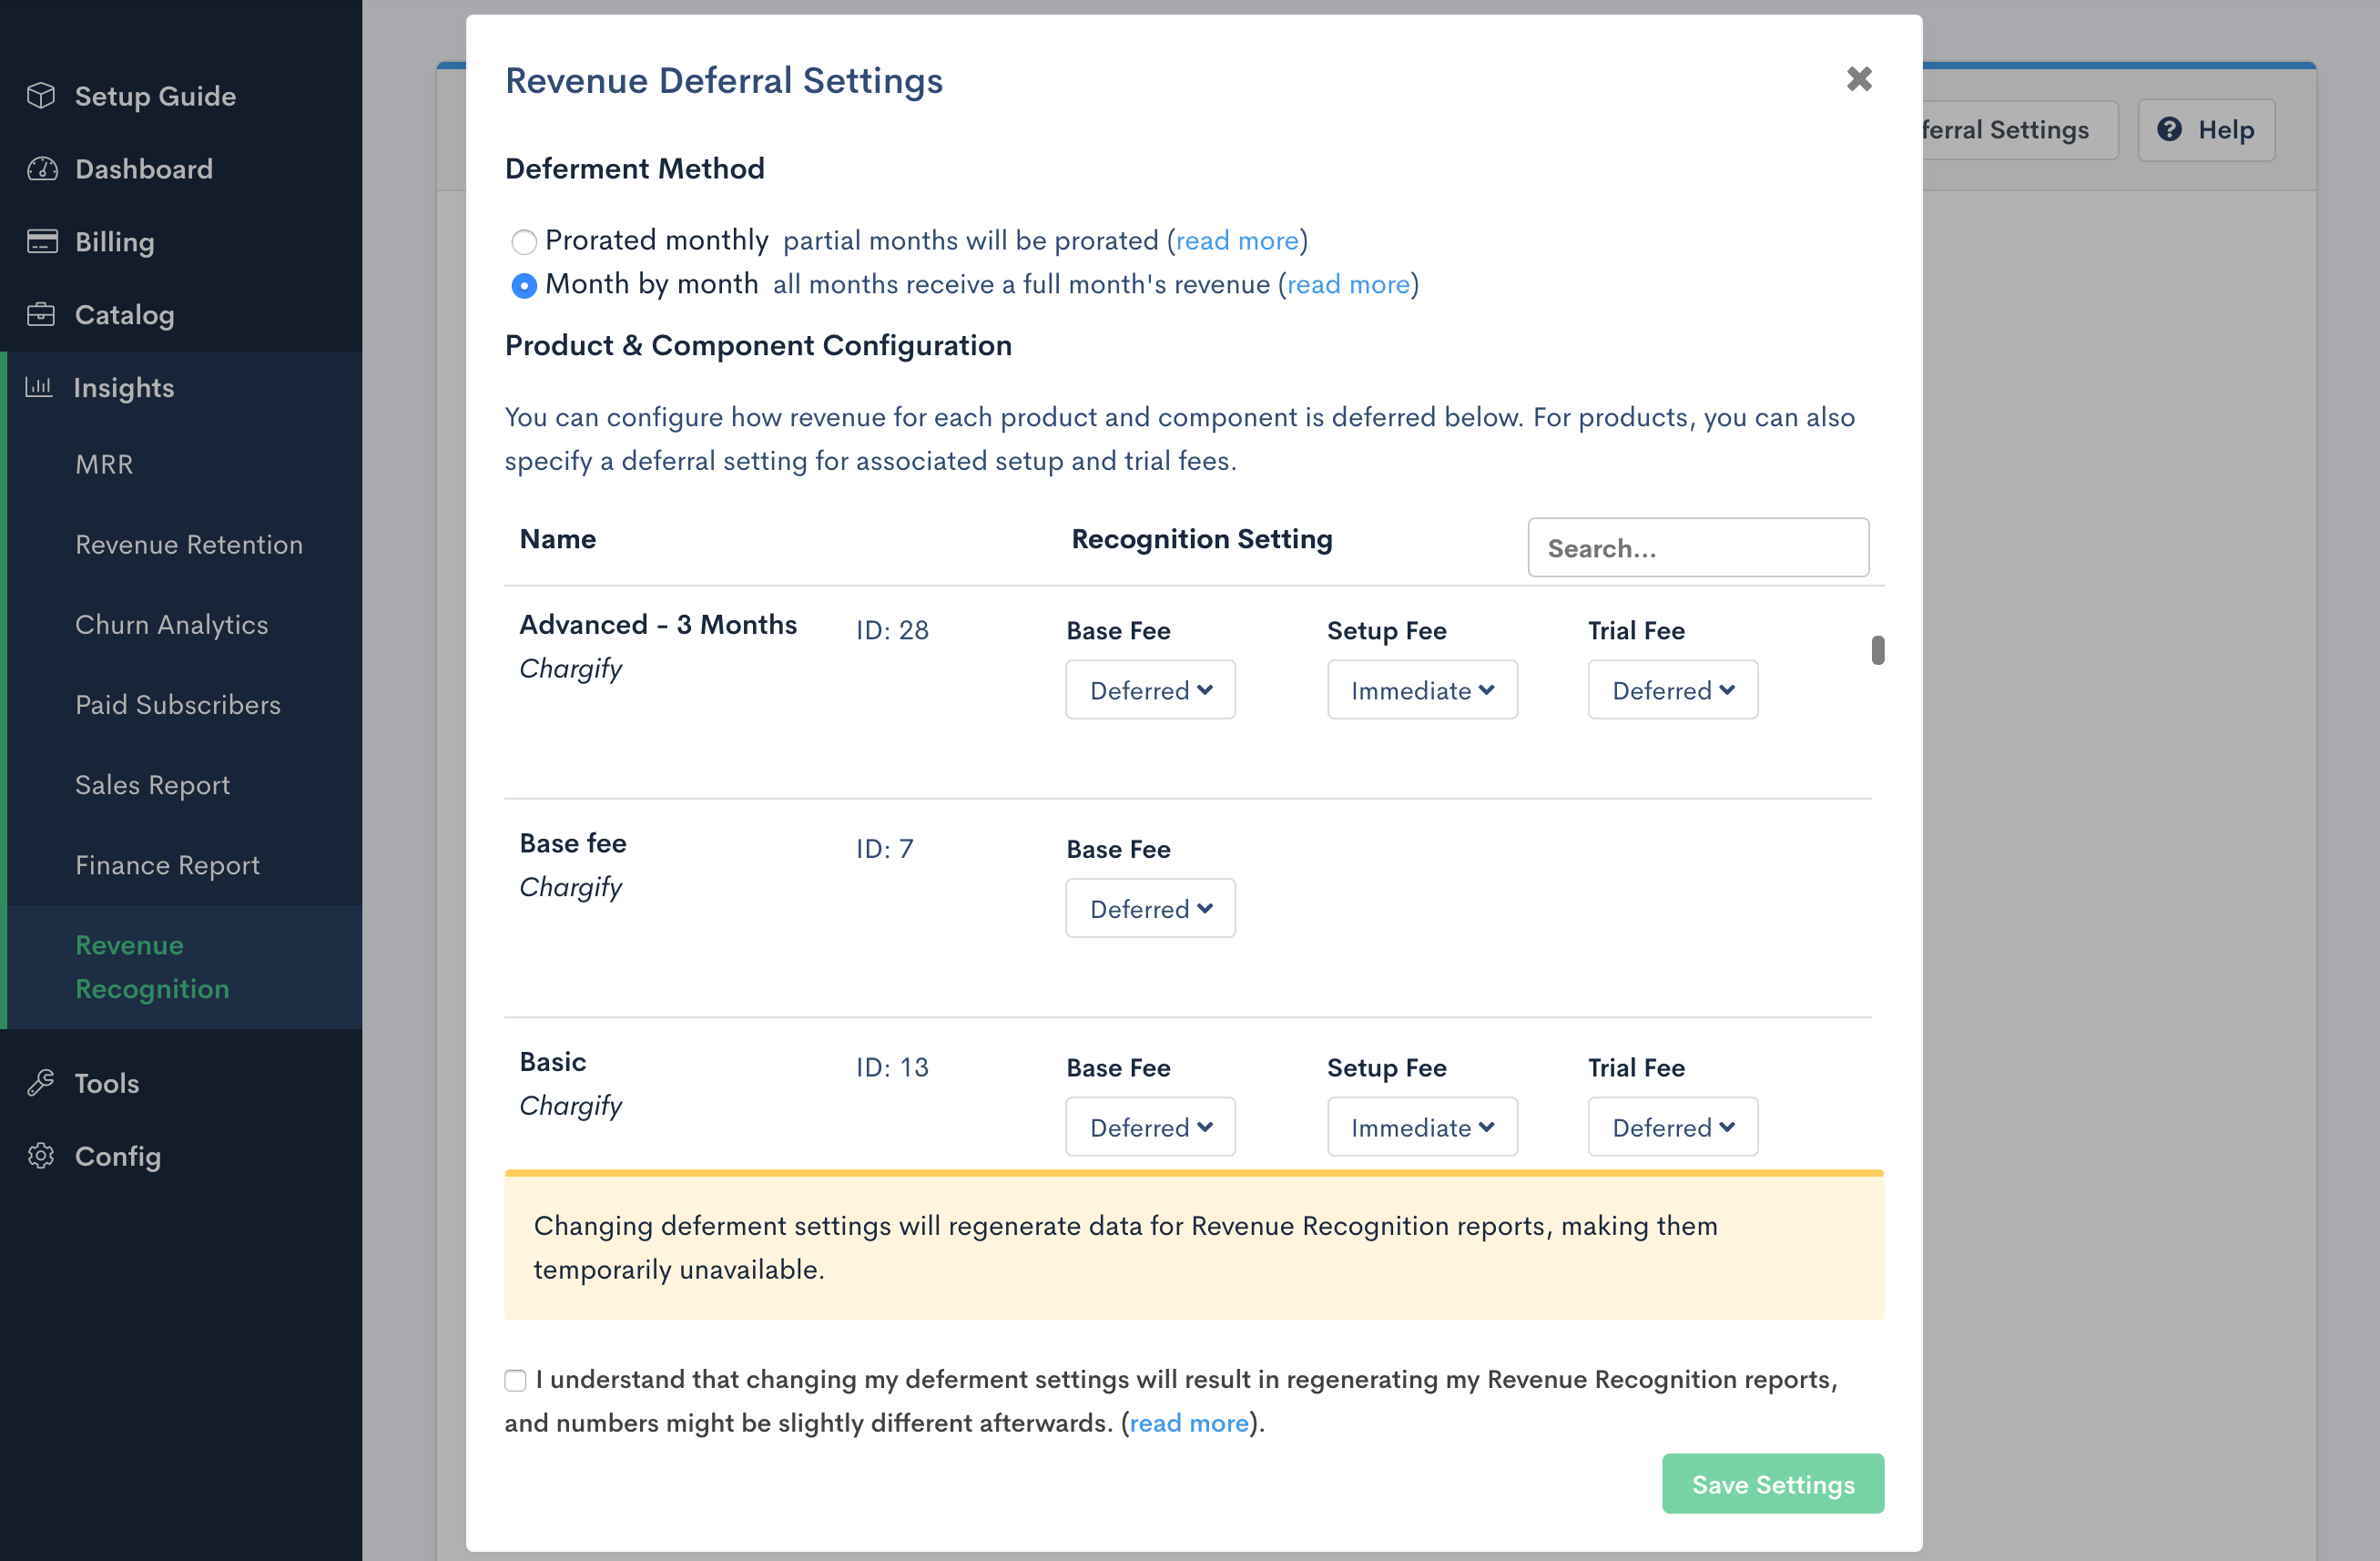
You can configure how revenue for each product and component is deferred by opening the Revenue Deferral Settings window.

Click the Revenue Deferral Settings
Deferment method
The deferment method determines how revenue is distributed among months in the service period.
Prorated monthly - Partial months will receive a prorated amount based on the number of eligible days in that month. Full months will receive a full month’s worth of revenue.
Example: Given a subscription that is billed $300 every three months starting June 16th, you would see $50 of revenue in June, $100 in July and August, and $50 in September.
| Jun | Jul | Aug | Sep |
| $50 | $100 | $100 | $50 |
Month by month - Months will receive equal amounts of revenue starting with the first of the service period.
Given the same example above where a subscription that is billed $300 every 3 months starting June 16th, you would see $100 in June, July and August and no revenue in September.
| Jun | Jul | Aug | Sep |
| $100 | $100 | $100 |
Note: Service periods in Advanced Billing show as June 16 to Sep 16. For Revenue Recognition purposes, revenue will be calculated one day less, from June 16 to Sep 15 to avoid double reporting of revenue upon renewal.
Product & Component Configuration
Products can be configured so that the Base Fee, Trial Fee and Setup Fee each have a different deferral setting. You can also choose a deferral setting for your components.
- Deferred - This option will distribute revenue over the entire service period
- Immediate - This option will recognize revenue entirely at the beginning of the service period

Configure deferral settings for all products and components
Using the reports
What’s included
- Invoice line items - each invoice line item will be calculated separately based on the Revenue Deferral Settings
- Discounts - Revenue recognition calculations will use the net amount after discounts are applied
- Credit Notes - Upgrade/downgrade migration credit, mid-period/prorated component downgrade, full void, and full refund credits will be included in revenue recognition calculations as separate lines from the invoice line items
What’s not included
- Taxes - Taxes will not be included in the revenue recognition calculations
- Credit Notes - Service credits, partial voids, and partial refunds will not be included in revenue recognition calculations
Changing the report date range
You can select a pre-defined date range such as Current FY, or change the From and To. Click the View Results button to update the report.

Using the Field Chooser
You can choose with data row columns to include by using the Field Chooser buton in the upper-right hand corner of the table to open the Field Chooser modal window. You can include/exclude any available fields. Note that the state and country used in this selection come from the shipping address stored with the customer record.

Field Chooser
Sorting/filtering columns
You can sort and filter row columns by clicking the sort or filter buttons in the header for that column.

Sorting and filtering row columns
Downloading your report
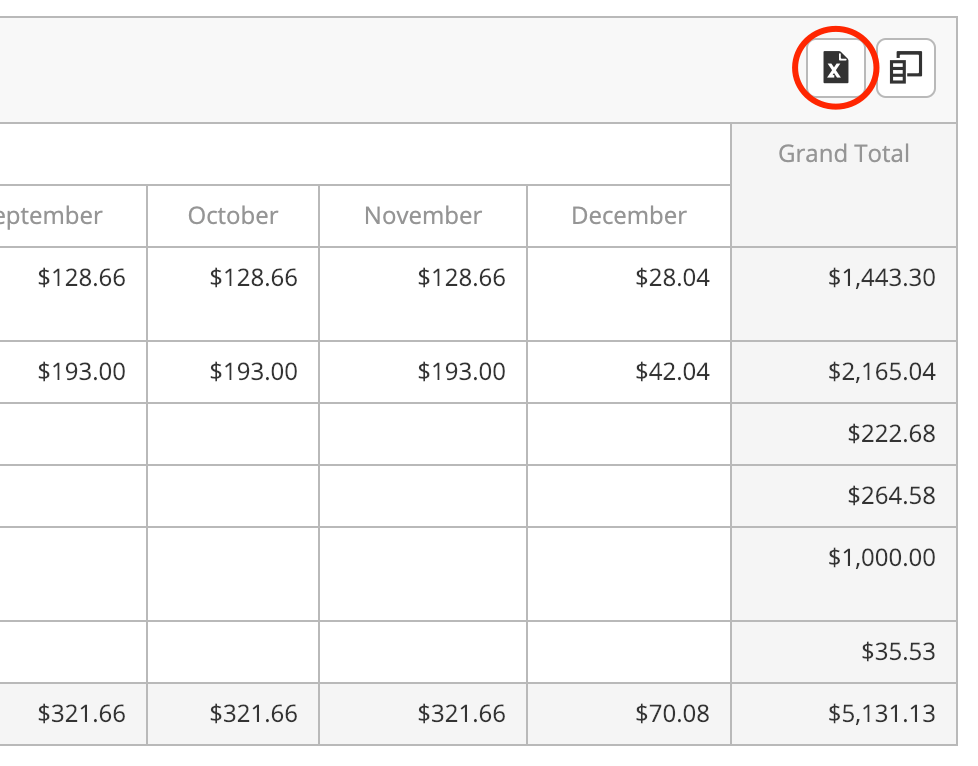
You can download your report in Excel (xlsx) format by clicking the excel button in the upper-right hand corner of the table. Any sorting or filtering applied to the report will also be done in the downloaded file.

Downloading your report
Exporting a CSV
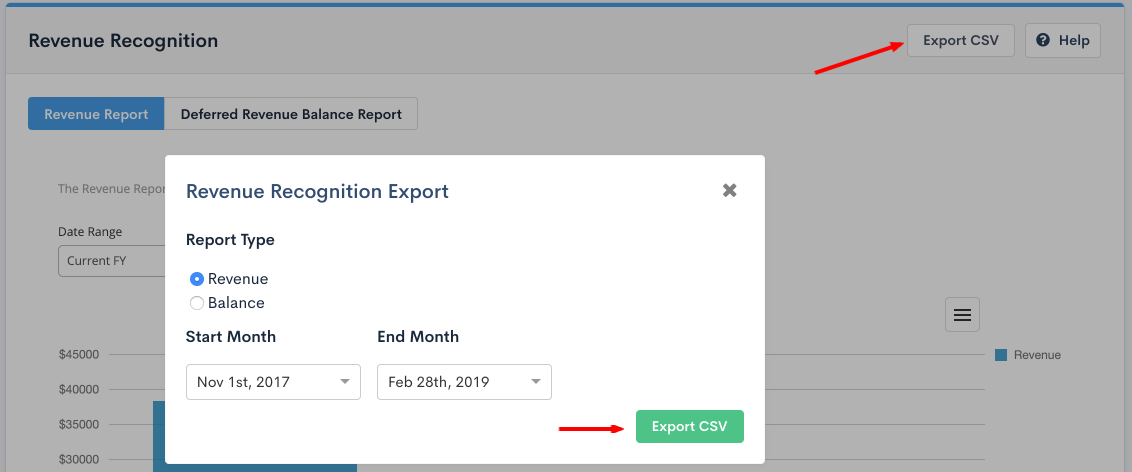
You can export your report as a CSV by clicking the Export CSV button. This will allow you to export your revenue recognition data on a transaction-level basis.

Exporting your report
For more information about the CSV Export please visit Exporting Data. Your exported report can be found in the list of Downloads.
Revenue Report
The Revenue Report shows how much revenue can be recognized each month.
Given the example above, you might see the following on the Revenue Report.
| Jun | Jul | Aug | Sep |
| $50 | $100 | $100 | $50 |
Balance Report
The Balance Report shows the calculated Deferred Revenue balance at the end of each month. The Deferred Revenue balance will increase by the amount of the transaction on the transaction date. The balance will decrease as revenue is recognized at the end of each month.
Given the example above, you might see the following on the Balance Report.
| Jun | Jul | Aug | Sep |
| $250 ($300-$50) | $150 ($250-$100) | $50 ($150-$100) | $0 ($50-$50) |